Eye Makeup Tools Guide
Looking for a complete eye makeup tools guide? This resource explains every essential tool from blending brushes to eyelash curlers. You will learn what each tool does, how to clean them, and which ones suit your eye shape. Start creating beautiful eye makeup with confidence.
Do you want pretty eye makeup without stress? The right tools help a lot. This eye makeup tools guide shows you exactly what to get. You do not need many items. Just a few good ones can make your eyes pop. I will explain each tool and how to use it. Let us begin.
Why Good Eye Makeup Tools Matter
Bad tools can ruin your look. Cheap brushes may scratch your skin. They also do not blend well. Good tools give you smooth color. They feel soft and last long. You save money over time. Also, your makeup stays fresh. Think of tools as a small investment. A set of quality items works better than many bad ones.
“The secret to great makeup is not the product price, but the tools you use to apply it.” – Rae Morris
When you use poor tools, your eyeshadow can look patchy. Your eyeliner may skip. Your mascara might clump. These problems go away with proper tools. You also avoid eye infections. Dirty or rough tools can bring bacteria near your eyes. So choose wisely. Your eyes deserve care.
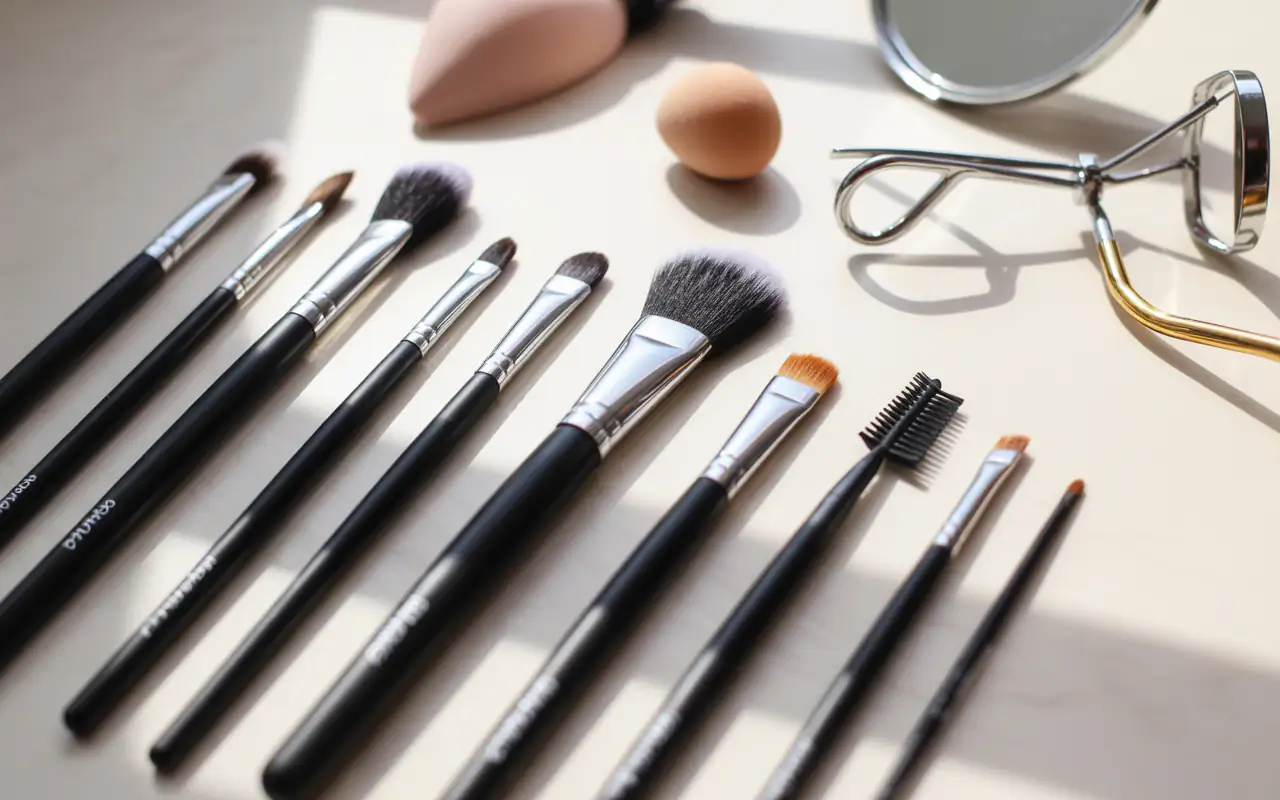
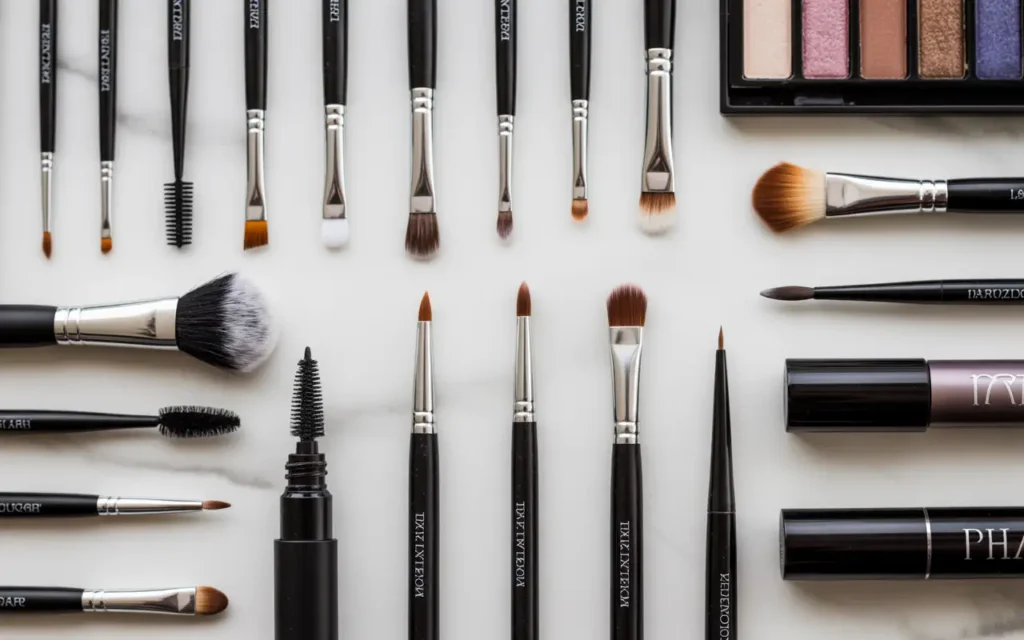
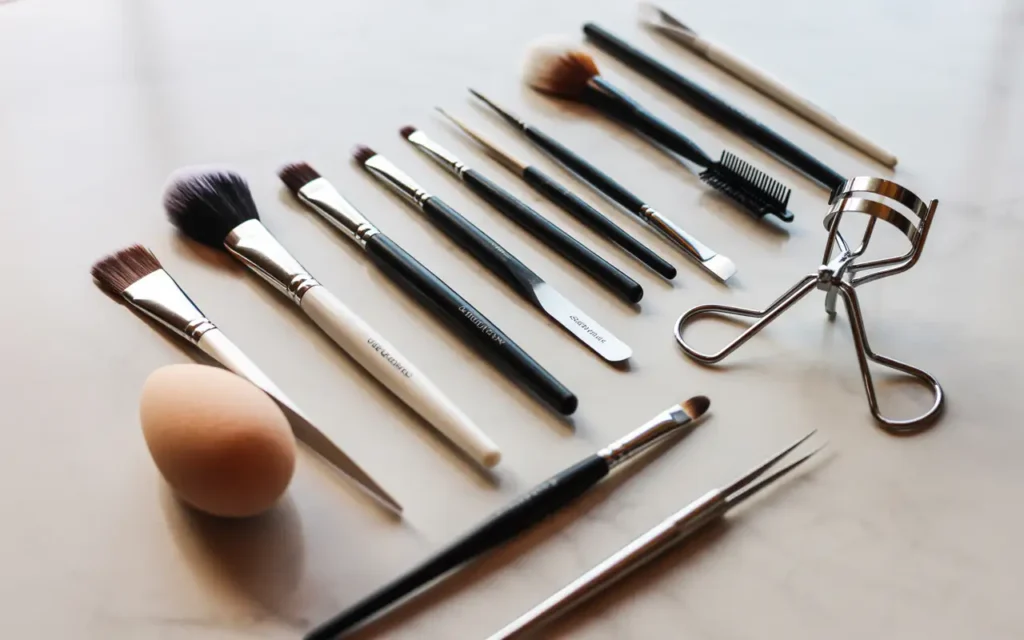
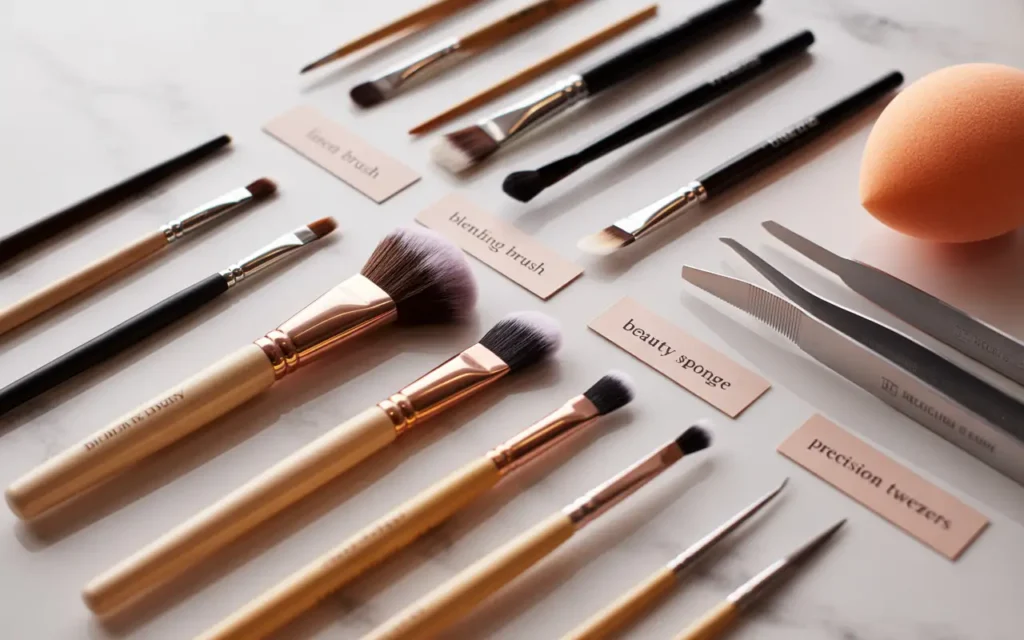
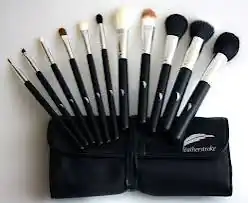
The Basic Eye Makeup Tools You Need
This eye makeup tools guide focuses on six must-have items. You can start with these. Later, you may add more. But these give you a strong start.
Flat Shader Brush
A flat shader brush has a firm, flat shape. It picks up a lot of product. Use it to press color onto your lid. This brush works best for shimmery shadows. You pat the color on. Do not swipe. Patting gives more shine.
Fluffy Blending Brush
This brush is soft and round. It has longer hairs. You use it to blend colors in your crease. Blending removes harsh lines. It makes your eyeshadow look smooth. A good blending brush changes everything.
Crease Brush
A crease brush is smaller than a blending brush. It has a pointed or tapered shape. You place color right into your eye crease. This adds depth. Use it with medium or dark shades. Start with a little product. Build slowly.
Angled Liner Brush
This brush has short, slanted hairs. You dip it into gel eyeliner or dark eyeshadow. Then you draw a line along your lashes. The angle helps you make thin or thick lines. You can also use it for your brows.
Smudge Brush
A smudge brush is short and dense. It has a rounded tip. You use it to soften eyeliner. Just run it along the line right after you apply liner. This creates a smoky look. It also works for placing shadow on the lower lash line.
Spoolie Brush
A spoolie looks like a tiny mascara wand. It has plastic bristles. You use it to brush your brows. It also removes extra mascara clumps. Keep one spoolie clean for brows. Use another for lashes.
Brush Types and Their Main Jobs
| Brush Name | Shape | Best For |
|---|---|---|
| Flat Shader | Flat, firm | Pressing shimmer on lid |
| Fluffy Blending | Round, soft | Blending crease colors |
| Crease Brush | Pointed, small | Adding depth to crease |
| Angled Liner | Slanted, short | Drawing gel eyeliner |
| Smudge Brush | Dense, rounded | Softening liner, smoky eyes |
| Spoolie | Spiral plastic | Brushing brows, separating lashes |
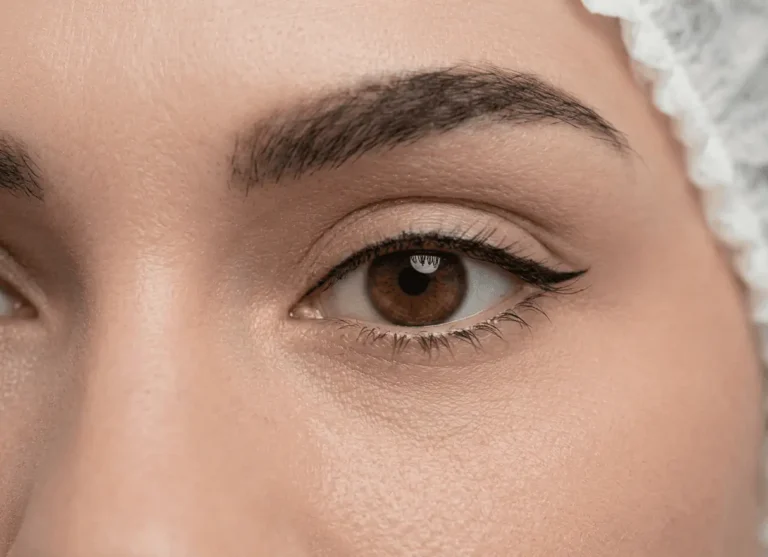
Eyelash Curlers and Their Use
An eyelash curler is a metal tool with a padded clamp. You squeeze it to curl your lashes. This makes your eyes look bigger. It also helps mascara work better. This eye makeup tools guide recommends using a curler before mascara. Never use it after mascara. The mascara can stick to the pad. You might pull out your lashes.
Curl your lashes before mascara, not after, or you might pull them out.” – Charlotte Tilbury
How to curl safely: Open the curler. Place your lashes inside the clamp. Close gently near the base of your lashes. Hold for five seconds. Release. Move the curler halfway up your lashes. Squeeze again for three seconds. This gives a natural curl. Clean the rubber pad with a wipe after each use. Replace the pad every two to three months.
Sponge Applicators vs Brushes
Many drugstore eyeshadow palettes come with a small sponge tip. These sponges work in a pinch. They pick up color well. But they waste product. They also cannot blend nicely. Sponges are hard to clean. You throw them away after a few uses. In any good eye makeup tools guide, you will see brushes recommended over sponges.
Brushes cost more upfront. But they last for years. They blend like a dream. You can wash them many times. They give you control. For example, a flat brush places color exactly where you want. A blending brush softens edges. Sponges cannot do that. So invest in two or three good brushes. Start with a flat shader and a fluffy blender. You will see the difference right away.
How to Clean Your Eye Makeup Tools
Dirty tools cause breakouts and eye infections. They also make colors look muddy. Cleaning is quick and easy. Do it every week for brushes you use daily. For sponges, wash them after each use or use a fresh one.
Steps to clean brushes:
- Wet the bristles with lukewarm water.
- Put a drop of mild soap in your palm. Baby shampoo works great.
- Swirl the brush in your palm. Rinse until water runs clear.
- Squeeze out extra water gently. Do not pull the bristles.
- Lay the brush flat on a towel to dry. Do not stand it up. Water can loosen the glue inside.
Cleaning Schedule for Eye Makeup Tools
| Tool | How Often to Clean |
|---|---|
| Eyeshadow brushes | Once a week |
| Eyeliner brush | After each use (gel or cream liners) |
| Eyelash curler pad | Wipe after each use |
| Spoolie | Once a week (rinse with soap) |
| Sponge applicators | After each use or discard |
Clean your eyelash curler with an alcohol wipe. This kills bacteria. Never share your eye tools with others. That spreads infections like pink eye.
Choosing Tools for Your Eye Shape
Your eye shape changes which tools work best. This eye makeup tools guide helps you pick based on your unique eyes.
Hooded eyes: Your brow bone covers part of your lid. Use a smaller blending brush. Keep colors below the crease. A flat shader brush helps you place shimmer on the visible lid.
Deep-set eyes: Your eyes sit farther back. Use a medium-sized blending brush. Focus light colors on the lid. Dark colors can make eyes look even deeper, so use them only on the outer corner.
Monolid eyes: You have no visible crease. Use a flat brush to pack color on the lid. Then use a fluffy brush to blend upward. An angled liner brush helps you draw a thicker line that shows when your eyes are open.
Round eyes: You have visible white around the iris. Use a crease brush to add shadow to the outer corner. This makes eyes look longer. An eyelash curler opens them up even more.
Almond eyes: This shape is balanced. Almost any tool works. Focus on blending brushes for soft gradients.
“Your eye shape tells you which brush angle works best for you.” – Wayne Goss
Try different brush sizes. A brush that feels too big for your eye might be wrong. Start small. You can always use a bigger brush later.
Common Mistakes to Avoid
A smart eye makeup tools guide warns you about these errors. Avoid them for better results.
Mistake 1: Not cleaning tools – Dirty brushes give you dull color and skin problems. Clean them weekly.
Mistake 2: Using the wrong brush for a product – Cream shadows need dense, synthetic brushes. Powders work with soft, natural hair. Mixing them causes patchy application.
Mistake 3: Pumping your mascara wand – This pushes air into the tube. The mascara dries out faster. Instead, twist the wand slowly.
Mistake 4: Sharing eye tools – Bacteria spread fast. Always use your own curlers, brushes, and spoolies.
Mistake 5: Pressing too hard with an eyelash curler – This can pinch your skin or break lashes. Squeeze gently. Hold for a few seconds only.
Mistake 6: Storing brushes upright while wet – Water drips into the handle. The glue loosens. Bristles fall out. Always dry brushes flat.
Frequently Asked Questions
Q: What is the most important tool in an eye makeup tools guide?
A: A blending brush is often the top pick. It removes harsh lines. It makes any eyeshadow look smooth.
Q: How many brushes do I need to start?
A: This eye makeup tools guide suggests starting with three: a flat shader, a fluffy blender, and an angled liner. That covers basic looks.
Q: Can I use my fingers instead of brushes?
A: Yes, for cream shadows or shimmer. But fingers cannot blend like a brush. They also transfer oils to your eyeshadow. Brushes give cleaner results.
Q: How do I know if a brush is good quality?
A: Look for soft bristles that do not shed. Pull gently on the bristles. If none come out, it is good. The handle should feel solid, not wobbly.
Q: Are expensive brushes always better?
A: Not always. Some mid-priced brands work very well. Read reviews. Feel the brush in a store if you can. Price does not guarantee quality.
Q: How often should I replace my eyelash curler pad?
A: Replace the rubber pad every two to three months. The pad gets hard and can cut your lashes. Many curlers come with extra pads.
Q: What is the best way to clean a spoolie?
A: Swirl it in warm soapy water. Rinse well. Let it air dry. A clean spoolie brushes brows without leaving residue.
Q: Can I use the same brush for powder and cream products?
A: It is better to have separate brushes. Creams can make powder brushes hard. If you must use one, wash it right after each use.
Conclusion
You now have a full eye makeup tools guide that covers everything from brushes to curlers. Start with a few basic tools. Keep them clean. Match them to your eye shape. Avoid common mistakes. You do not need a huge collection. Quality and care matter more. Follow this eye makeup tools guide for easy, beautiful eyes every day. Go ahead and enjoy your makeup time. Your eyes will thank you.
Related posts
 Best Eyeliner for Beginners: Easy-to-Use Picks for Flawless Lines
Find the best eyeliner for beginners. Compare liquid, pencil, and waterproof options for easy application and lasting wear. Get your perfect look. Starting with eyeliner can…
 Finding the Best Electric Makeup Brush and Cleaner for Your Beauty Kit
Explore finding the best electric makeup brushes and cleaners. Compare features like fast drying, multiple collar sizes, and portability to find the perfect tools for your…
 Best Lip Stain for a Natural Look: Top Picks for Effortless Color
Discover the best lip stain for a natural look. Compare top choices for long-lasting color, comfortable wear, and subtle finishes to find your perfect match. Finding…