
How To Check Alternator With Multimeter
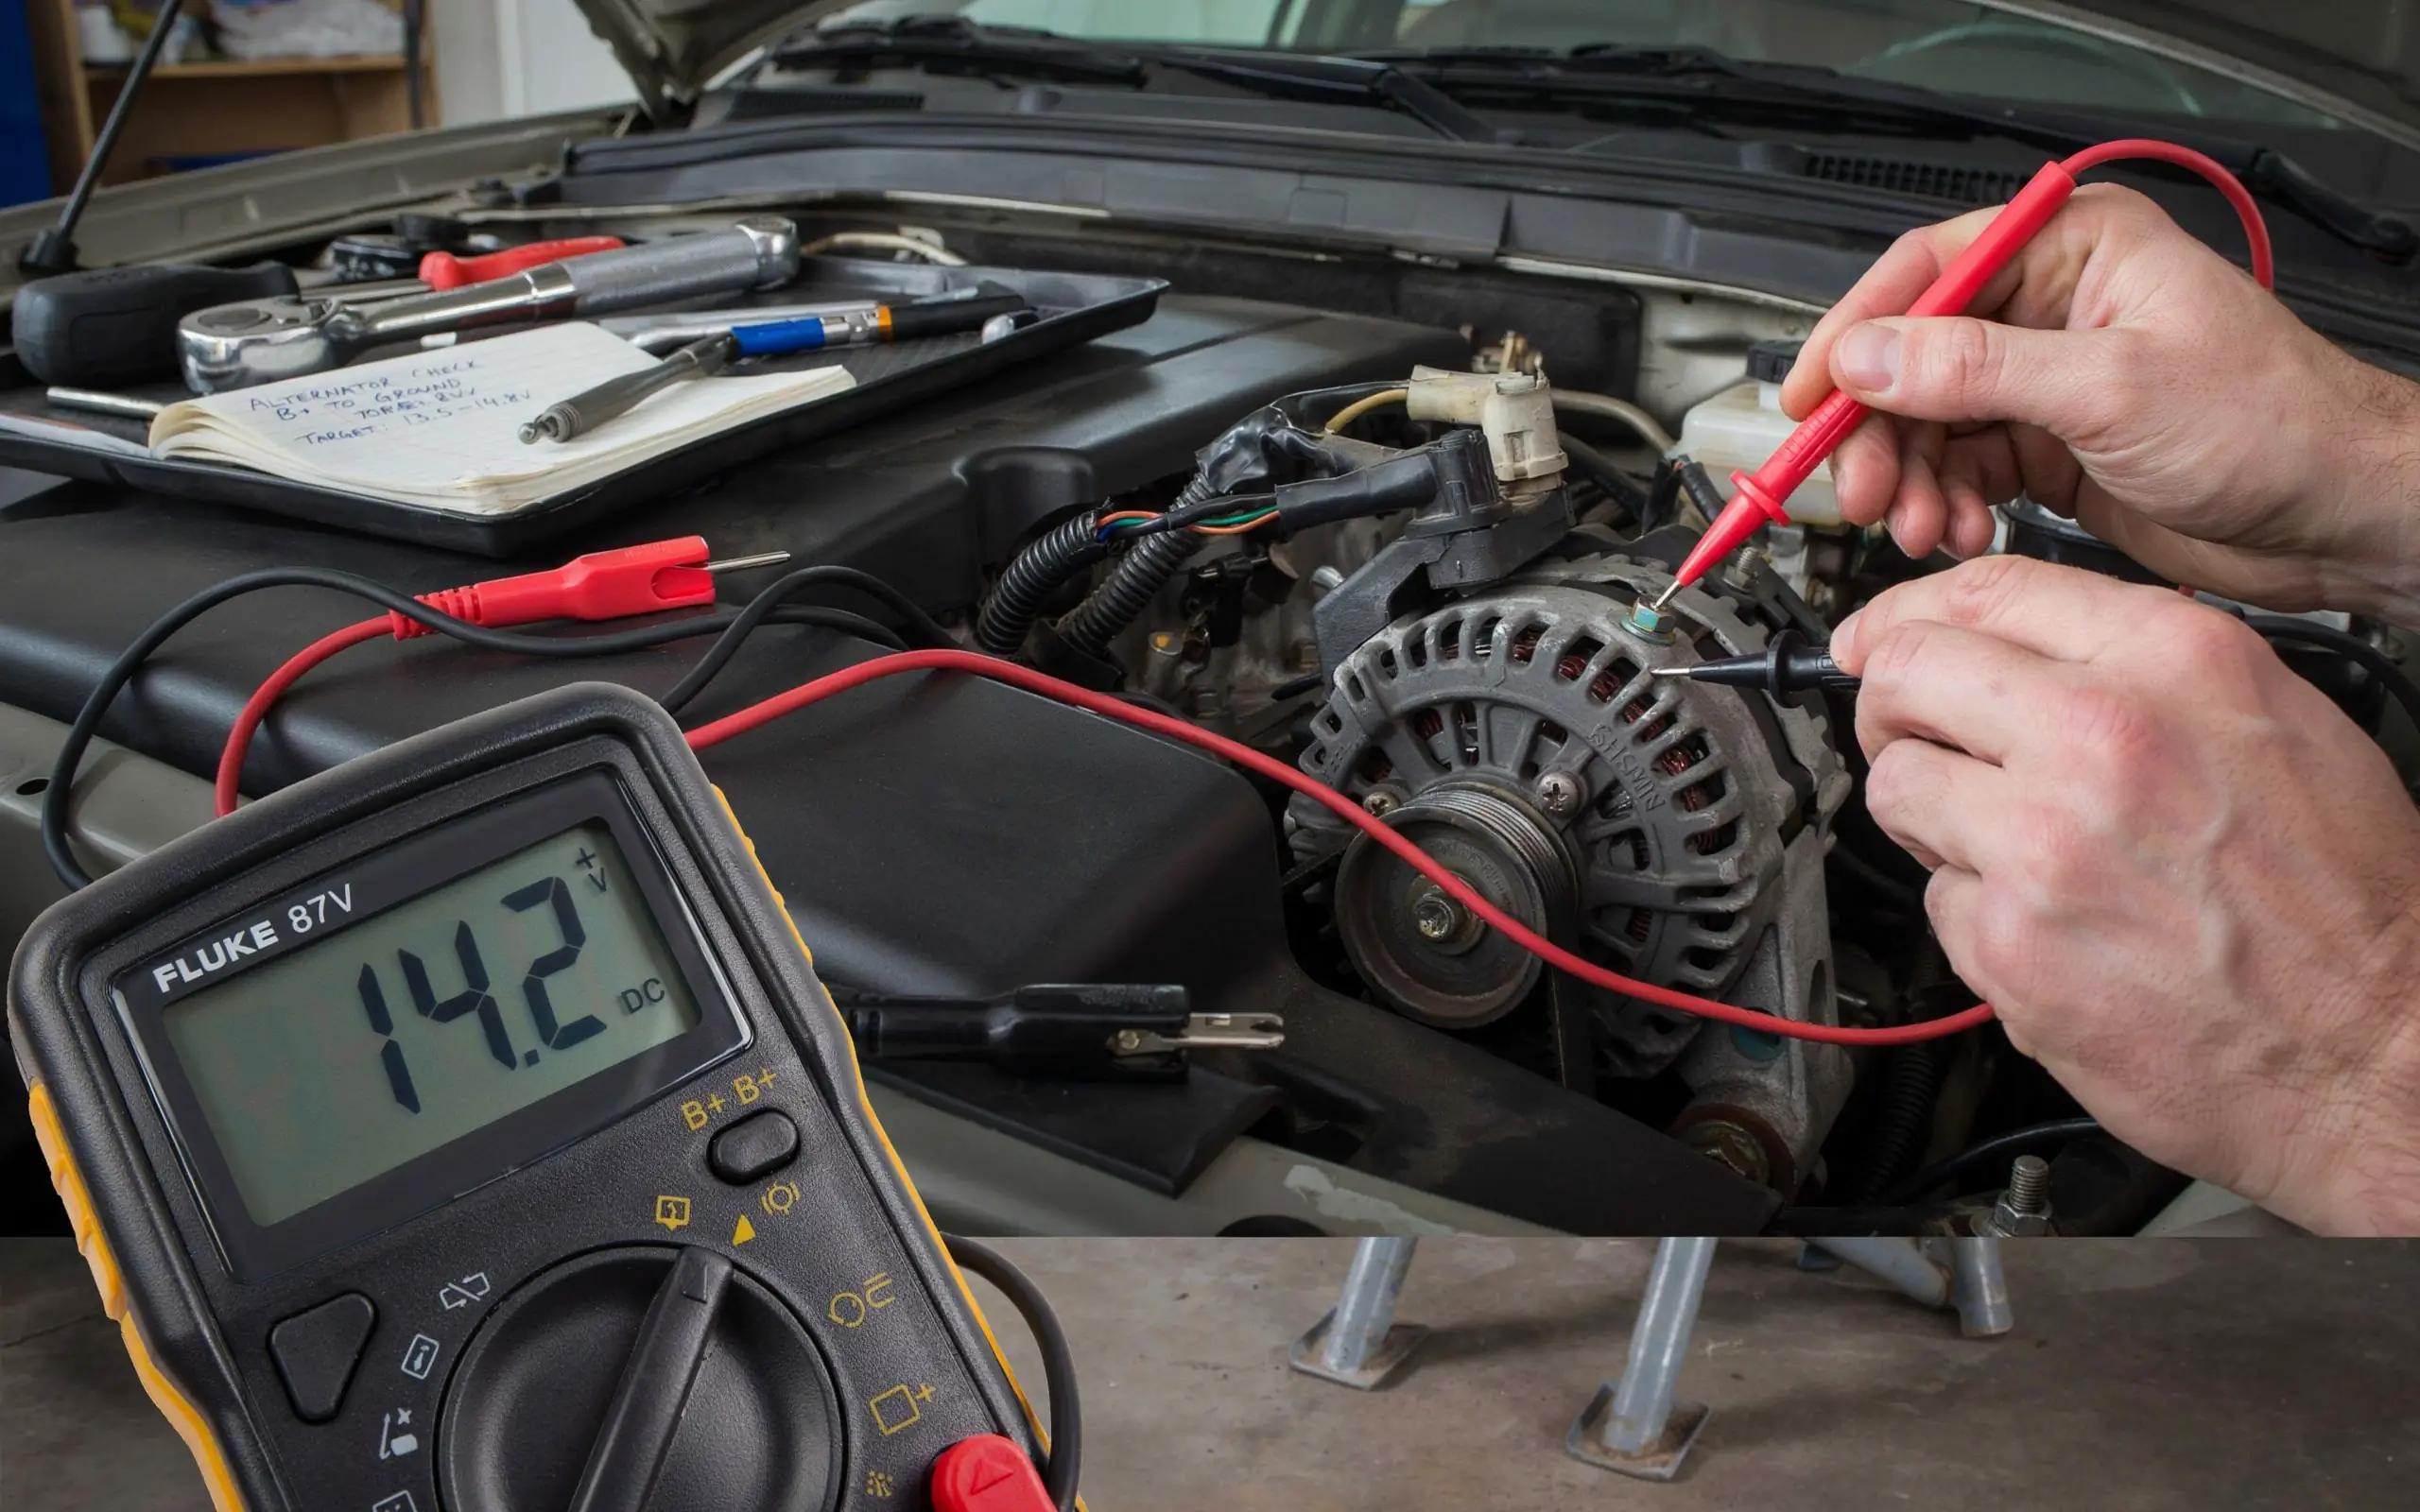
Learn exactly how to check alternator with multimeter in this simple guide. Discover voltage tests, diode checks, and troubleshooting tips to fix your car battery issues quickly.
Your car won’t start. The battery light glows on your dashboard. You jump the battery, but it dies again after a short drive. These signs point to one thing. Your alternator might be failing. Many drivers panic and buy a new battery first. That costs money and time. But there is a better way. You can test the alternator yourself at home. All you need is a basic tool called a multimeter.
This guide shows you how to check alternator with multimeter in clear steps. You do not need to be a mechanic. You just need to follow simple instructions. We will cover voltage tests, diode checks, and safety tips. By the end, you will know if your alternator works or needs replacement. Let us get started and save you a trip to the repair shop.
What Is an Alternator and Why Does It Matter?
The alternator is a small generator in your car. It turns mechanical energy into electrical energy. Your battery starts the engine. But the alternator keeps everything running. It powers your lights, radio, AC, and computer system. Without a working alternator, your battery drains fast. The engine stops, and you get stranded.
Think of the battery as a starter motor. The alternator is the main power source during driving. It recharges the battery while the engine runs. A bad alternator causes many problems. Your headlights may dim. Your dashboard lights flicker. You may hear strange noises from the engine. Some cars even shut down completely.
That is why you need to check alternator with multimeter regularly. A quick test helps you avoid breakdowns. It also saves you from buying parts you do not need. Many people replace batteries unnecessarily. But the real problem is often the alternator. Let us find out how to test it properly.
“Most electrical issues in cars come from poor connections, not bad parts. Always check your battery cables first.” – James Peterson, Auto Electrician with 30 years of experience

Tools You Need Before You Start
Before we learn how to check alternator with multimeter, gather these tools:
- A digital multimeter (any basic model works)
- Safety gloves and glasses
- Your car owner’s manual
- A notebook or phone to record readings
- A helper (optional but helpful)
You can buy a multimeter for under 20 dollars. It is a smart investment for any car owner. Make sure your multimeter has DC voltage settings. Most digital models have this feature. Avoid analog meters if possible. They are harder to read accurately.
The process to check alternator with multimeter takes about 15 minutes. You do not need special skills. Just follow each step carefully. Park your car on a flat surface. Turn off the engine. Open the hood and locate the battery. Find the alternator too. It looks like a metal cylinder with wires attached.
Safety First: Important Precautions
Safety matters when working with car electrical systems. Your battery stores huge amounts of power. A mistake can cause sparks or shocks. Follow these rules to stay safe:
- Turn off the engine completely.
- Remove metal jewelry like rings or watches.
- Keep your hands and tools away from moving belts.
- Check for fluid leaks before touching anything.
- Wear safety glasses to protect your eyes.
Car batteries produce hydrogen gas. This gas is explosive. Never smoke near the battery. Avoid creating sparks near the terminals. Always connect and disconnect wires in the right order. Red means positive. Black means negative. Remember these colors.
If you feel unsure, ask someone experienced to help. There is no shame in seeking assistance. But learning to check alternator with multimeter is quite simple. You just need care and patience. Let us move to the actual testing process now.
Step 1: Check Your Battery First
This step is crucial. You must test the battery before the alternator. A dead battery gives false readings. You cannot check alternator with multimeter if your battery is weak. The alternator needs some charge to show proper output.
Start by setting your multimeter to DC voltage. Choose the 20-volt range if available. Connect the red probe to the positive battery terminal. Connect the black probe to the negative terminal. Read the voltage on the screen.
A healthy battery shows 12.6 volts or more. This reading means the battery is fully charged. If you see 12.4 volts, the battery is 75% charged. Below 12.2 volts means the battery is weak. You need to charge it first. Use a battery charger for a few hours. Then retest before moving forward.
Battery Voltage Readings and Their Meaning
| Voltage Reading | Battery Status | What To Do |
|---|---|---|
| 12.7V or higher | Fully charged | Proceed to alternator test |
| 12.4V – 12.6V | Partially charged | Acceptable for testing |
| 12.2V – 12.3V | Low charge | Charge battery first |
| Below 12.2V | Very weak | Charge or replace battery |
Step 2: Start the Engine and Take Initial Readings
Now we perform the first alternator test. Start your car engine. Let it idle for a minute. Keep all electrical accessories off. This means no radio, AC, or headlights. We want a clean reading.
Set your multimeter to DC voltage again. Connect the probes the same way as before. Red to positive, black to negative. Read the voltage while the engine runs.
A working alternator produces between 13.8 and 14.4 volts. This reading shows the alternator is charging the battery. If you see 13.0 volts or less, the alternator may be failing. Above 14.5 volts means overcharging. Both cases need attention.
Write down this first reading. You will compare it later. This simple test is the fastest way to check alternator with multimeter. But we need more tests for accuracy. Keep your engine running for the next step.
“Always test your alternator at different engine speeds. A good alternator gives steady voltage from idle to 2000 RPM.” – Robert Hayes, Senior Automotive Trainertep 3: Test Under Load Conditions
The alternator works harder when you use electrical devices. We need to test this scenario. This is the second major test to check alternator with multimeter. Turn on your headlights, AC fan, and radio. Set the AC to maximum speed. This creates a heavy load on the electrical system.
Now read the voltage again. A healthy alternator maintains voltage above 13.0 volts. Some drop is normal. But it should not fall below 12.8 volts. If your reading drops sharply, the alternator cannot handle the demand. This means internal parts may be weak.
Watch the voltage for 30 seconds. Does it stay steady? Or does it keep dropping? A steady reading is good. A dropping reading means trouble. The alternator regulates voltage automatically. A bad regulator causes fluctuating readings. You may also see lights dimming inside the car.
Step 4: Test at Higher Engine RPM
Your car needs more power at higher speeds. The alternator should produce more output. Raise your engine speed to 2000 RPM. Keep it steady for a moment. Read the voltage again.
A good alternator shows voltage between 14.0 and 14.8 volts at 2000 RPM. This is the peak output range. If you see voltage below 13.5 volts, something is wrong. The alternator cannot keep up with demand. If you see above 15.0 volts, the regulator is failing.
This test helps you identify intermittent problems. Some alternators work fine at idle but fail under load. The multimeter catches this issue clearly. This is why you need all three tests. One test alone is not enough.
Step 5: Perform a Diode Test
Diodes are small parts inside the alternator. They convert AC power to DC power. Your car uses DC power for all electrical systems. Bad diodes cause many problems. They allow AC current to leak through. This damages your battery and electrical parts.
You can check alternator with multimeter using the diode function. Most digital multimeters have this setting. Look for a symbol that looks like an arrow with a line. This is the diode test mode.
First, turn off the engine. Remove the negative battery cable for safety. Connect the multimeter probes to the alternator output terminal and ground. The red probe goes to the output terminal. The black probe goes to the alternator case. Read the display. A good diode shows a small voltage drop between 0.5 and 0.7 volts.
Then reverse the probes. Black to output terminal and red to ground. This time, the reading should show “OL” or infinity. This means no current flows in reverse. If you get a reading both ways, the diode is bad. You need a new alternator in that case.
Alternator Voltage Test Results Summary
| Test Condition | Healthy Range | Warning Signs |
|---|---|---|
| Engine off battery voltage | 12.4V – 12.7V | Below 12.2V |
| Engine idle (no load) | 13.8V – 14.4V | Below 13.5V or above 14.8V |
| Engine idle (full load) | Above 13.0V | Below 12.8V |
| 2000 RPM (no load) | 14.0V – 14.8V | Below 13.5V or above 15.0V |
| Diode test forward | 0.5V – 0.7V | Zero or high reading |
Step 6: Check the Alternator Belt
The alternator belt transfers power from the engine. A loose belt causes charging problems. You might check alternator with multimeter and see low voltage. But the alternator itself could be fine. The belt might just be slipping.
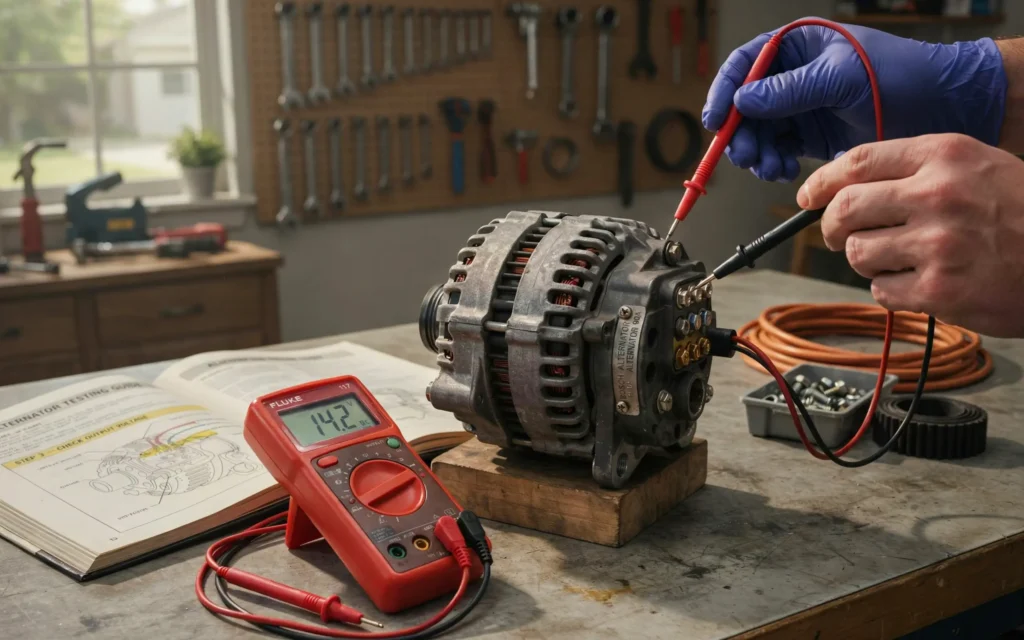
Inspect the belt tension. Push down on the belt between two pulleys. It should move about half an inch. More movement means the belt is loose. Look for cracks or wear on the belt surface. Glazed belts also slip easily.
A worn belt costs little to replace. But it causes the same symptoms as a bad alternator. Always check the belt before replacing expensive parts. Tighten or replace the belt as needed. Then retest your alternator with the multimeter.
Step 7: Interpret Your Results
Now you have all your readings. It is time to decide what they mean. Compare your numbers with the healthy ranges we discussed. This tells you the condition of your alternator.
Here is a simple guide:
Situation 1: Voltage below 13.5 at idle. Voltage drops with load. Belt is tight. These signs point to a failing alternator. You likely need a replacement.
Situation 2: Voltage stays between 13.8 and 14.4. Voltage stays steady with load. This means your alternator works perfectly. Your battery may need replacement instead.
Situation 3: Voltage above 15.0 at any speed. This means overcharging. The voltage regulator is faulty. This can damage your battery and electronics. Replace the alternator soon.
Situation 4: Voltage drops when you turn on accessories. But it recovers when you turn them off. This suggests a weak alternator. It may work for a while but needs attention.
Situation 5: Diode test shows current in both directions. This means bad diodes. The alternator outputs AC current. You need replacement right away.
Trust your readings. The multimeter does not lie. If you are unsure, test again. Sometimes loose connections cause false readings. Clean your battery terminals before retesting.
“A loose connection can mimic a dead alternator. Clean your terminals and retest before buying parts.” – Sarah Martinez, Master Mechanic and Workshop Owner
Common Symptoms of a Bad Alternator
Besides voltage tests, watch for these signs:
Dimming headlights – Your lights get brighter with engine speed. They dim when you stop at traffic lights. This is a classic symptom.
Battery warning light – This light stays on after starting. It may flicker while driving. The light indicates a charging problem.
Strange noises – You hear grinding or whining sounds. These come from bad bearings inside the alternator. The noise changes with engine speed.
Electrical failures – Your radio turns off randomly. Power windows work slowly. The AC fan runs weakly. These problems point to low voltage.
Frequent battery death – You keep jumping your battery. It dies again after a few days. The alternator is not recharging it properly.
Burning smell – You smell rubber burning. The alternator belt may be slipping. This creates friction and heat.
If you notice these signs, you should check alternator with multimeter immediately. Do not delay testing. A failing alternator leaves you stranded at the worst time.
How to Replace a Bad Alternator
If your tests show a bad alternator, replacement is the next step. This job takes about 1 to 2 hours. You need basic hand tools. Socket sets, wrenches, and a belt tensioner tool help.
Here is a basic process:
- Disconnect the negative battery cable.
- Remove the serpentine belt from the alternator.
- Unplug the electrical connector.
- Remove the bolts holding the alternator.
- Take out the old alternator.
- Install the new alternator.
- Reconnect the electrical plug.
- Put the belt back on.
- Reconnect the battery cable.
- Start the engine and retest voltage.
Make sure the new alternator matches your car model. The parts store can help you choose the right one. Some alternators come with a new belt. Consider replacing the belt too. Old belts wear out and cause slipping.
After installation, test again to check alternator with multimeter. Your readings should show healthy voltages. If not, check your connections and belt tension. The new part may need adjustment.
Preventing Alternator Problems
Prevention is better than repairs. Follow these tips to extend alternator life:
Keep your battery clean – Corrosion on terminals increases resistance. Clean terminals with baking soda and water. Use a wire brush for stubborn deposits.
Check the belt regularly – Inspect the belt every oil change. Look for cracks or glazing. Replace it if you see wear signs.
Avoid jump-starting mistakes – Connect cables correctly. Red to positive, black to negative. Wrong connections can damage the alternator.
Don’t overload the system – Using too many accessories at once stresses the alternator. Turn off devices you do not need.
Watch for fluid leaks – Oil or coolant leaks on the alternator cause damage. Fix leaks promptly.
Drive your car regularly – Long parking periods drain the battery. The alternator needs to recharge it. Drive at least weekly for 20 minutes.
These habits help you avoid sudden failures. You can also perform annual voltage tests. This catches problems early. It costs nothing and takes minutes. A proactive approach saves money and stress.
Frequently Asked Questions
1. Can I check alternator with multimeter while the engine is running?
Yes, this is the correct way to test. The engine must run to measure charging output. Always test with the engine idling first. Then add load and retest. Make sure your car is in Park with the parking brake on.
2. What voltage should I see when I check alternator with multimeter?
A healthy alternator produces 13.8 to 14.4 volts at idle. At higher RPM, you may see up to 14.8 volts. Readings below 13.5 volts indicate a problem. Readings above 15.0 volts also mean trouble.
3. How often should I check alternator with multimeter?
Test your alternator twice yearly. Do it in spring and fall before extreme weather. Also test it if you notice any symptoms. Regular testing prevents breakdowns. It also helps your battery last longer.
4. Can a bad battery cause an alternator test to fail?
Yes, a weak battery gives false readings. You must charge the battery fully before testing. A battery below 12.4 volts can confuse your results. Always test the battery first. Then proceed to alternator tests.
5. What is the diode test, and why is it important?
The diode test checks internal components of the alternator. Diodes convert AC to DC power. Bad diodes allow AC leakage. This damages your battery and electronics. The diode test confirms if these parts work properly.
6. My alternator passed the voltage test but fails the diode test. What now?
Replace the alternator. Bad diodes cause long-term problems. You may not see immediate symptoms. But your battery will degrade faster. Your car electronics may suffer damage too. Replacement is the only solution.
7. How long does an alternator usually last?
Most alternators last 80,000 to 150,000 miles. This depends on driving conditions and maintenance. Some fail earlier due to wear or leaks. Regular testing helps you monitor its health. You can plan replacement before failure occurs.
8. Is it safe to check alternator with multimeter alone?
Yes, it is completely safe if you follow precautions. Keep hands clear of moving belts. Wear safety glasses. Avoid wearing loose clothing. Follow the steps carefully. You do not need professional help for basic testing.
9. What causes an alternator to overcharge?
The voltage regulator controls output. A failed regulator lets voltage go too high. This boils battery fluid and damages plates. Overcharging also harms computer modules. Replace the alternator if you see over 15.0 volts.

10. Can I drive with a failing alternator?
You can drive a short distance. But the risk is high. The battery will drain fast. You may lose power steering and brakes. The engine will stall eventually. It is better to fix the problem before driving further.
Conclusion
Learning to check alternator with multimeter is an essential skill for every driver. It saves you time, money, and frustration. You avoid unnecessary tow truck calls. You prevent buying parts you do not need. You take control of your car’s health.
We covered battery tests, voltage tests, load tests, and diode tests. Each step gives you valuable information. The multimeter gives clear answers. You see numbers, not guesses. You can trust the data you collect.
Remember to test your battery first. A good battery makes your alternator test accurate. Then check voltage at idle, with load, and at higher RPM. These three tests cover most alternator issues. Perform a diode test for complete confidence.
Watch for common symptoms like dim lights and strange noises. Address problems early before they escalate. Regular testing becomes a habit. You check your oil and tire pressure. Add alternator testing to your routine. This simple practice gives you peace of mind.
Your car is a major investment. Take care of it with proper maintenance. A working alternator keeps your battery charged and systems running. You enjoy reliable transportation every day. You avoid unexpected breakdowns on busy roads.
Now you have the knowledge and steps to test your alternator. No more guessing or unnecessary repairs. You can check alternator with multimeter confidently. Share this guide with friends and family. Help them save money too. Safe driving starts with a reliable electrical system. Go ahead and test your alternator today. Your future self will thank you when you never get stuck with a dead battery again.
Related posts
 How to Strengthen Weak Nails: A Practical Guide to Daily Care
Learn how to strengthen weak nails with simple daily habits, protective care, and targeted hydration. Restore your natural nail strength today. Weak, peeling, or brittle nails…
 What Sounds Do Cats Dislike? 7 Noises That Stress Your Pet
Discover what sounds do cats dislike and why. Learn how to protect your cat’s sensitive hearing from stressful household noises and high-frequency hums. Cats dislike sounds…
 Restoring Faded Black Clothing: Practical Methods and Reality Checks
Can you restore faded black clothing? Learn the difference between temporary color revival and permanent redyeing, plus how to prevent future fading. You can restore the…