
Face Makeup Tools Explained
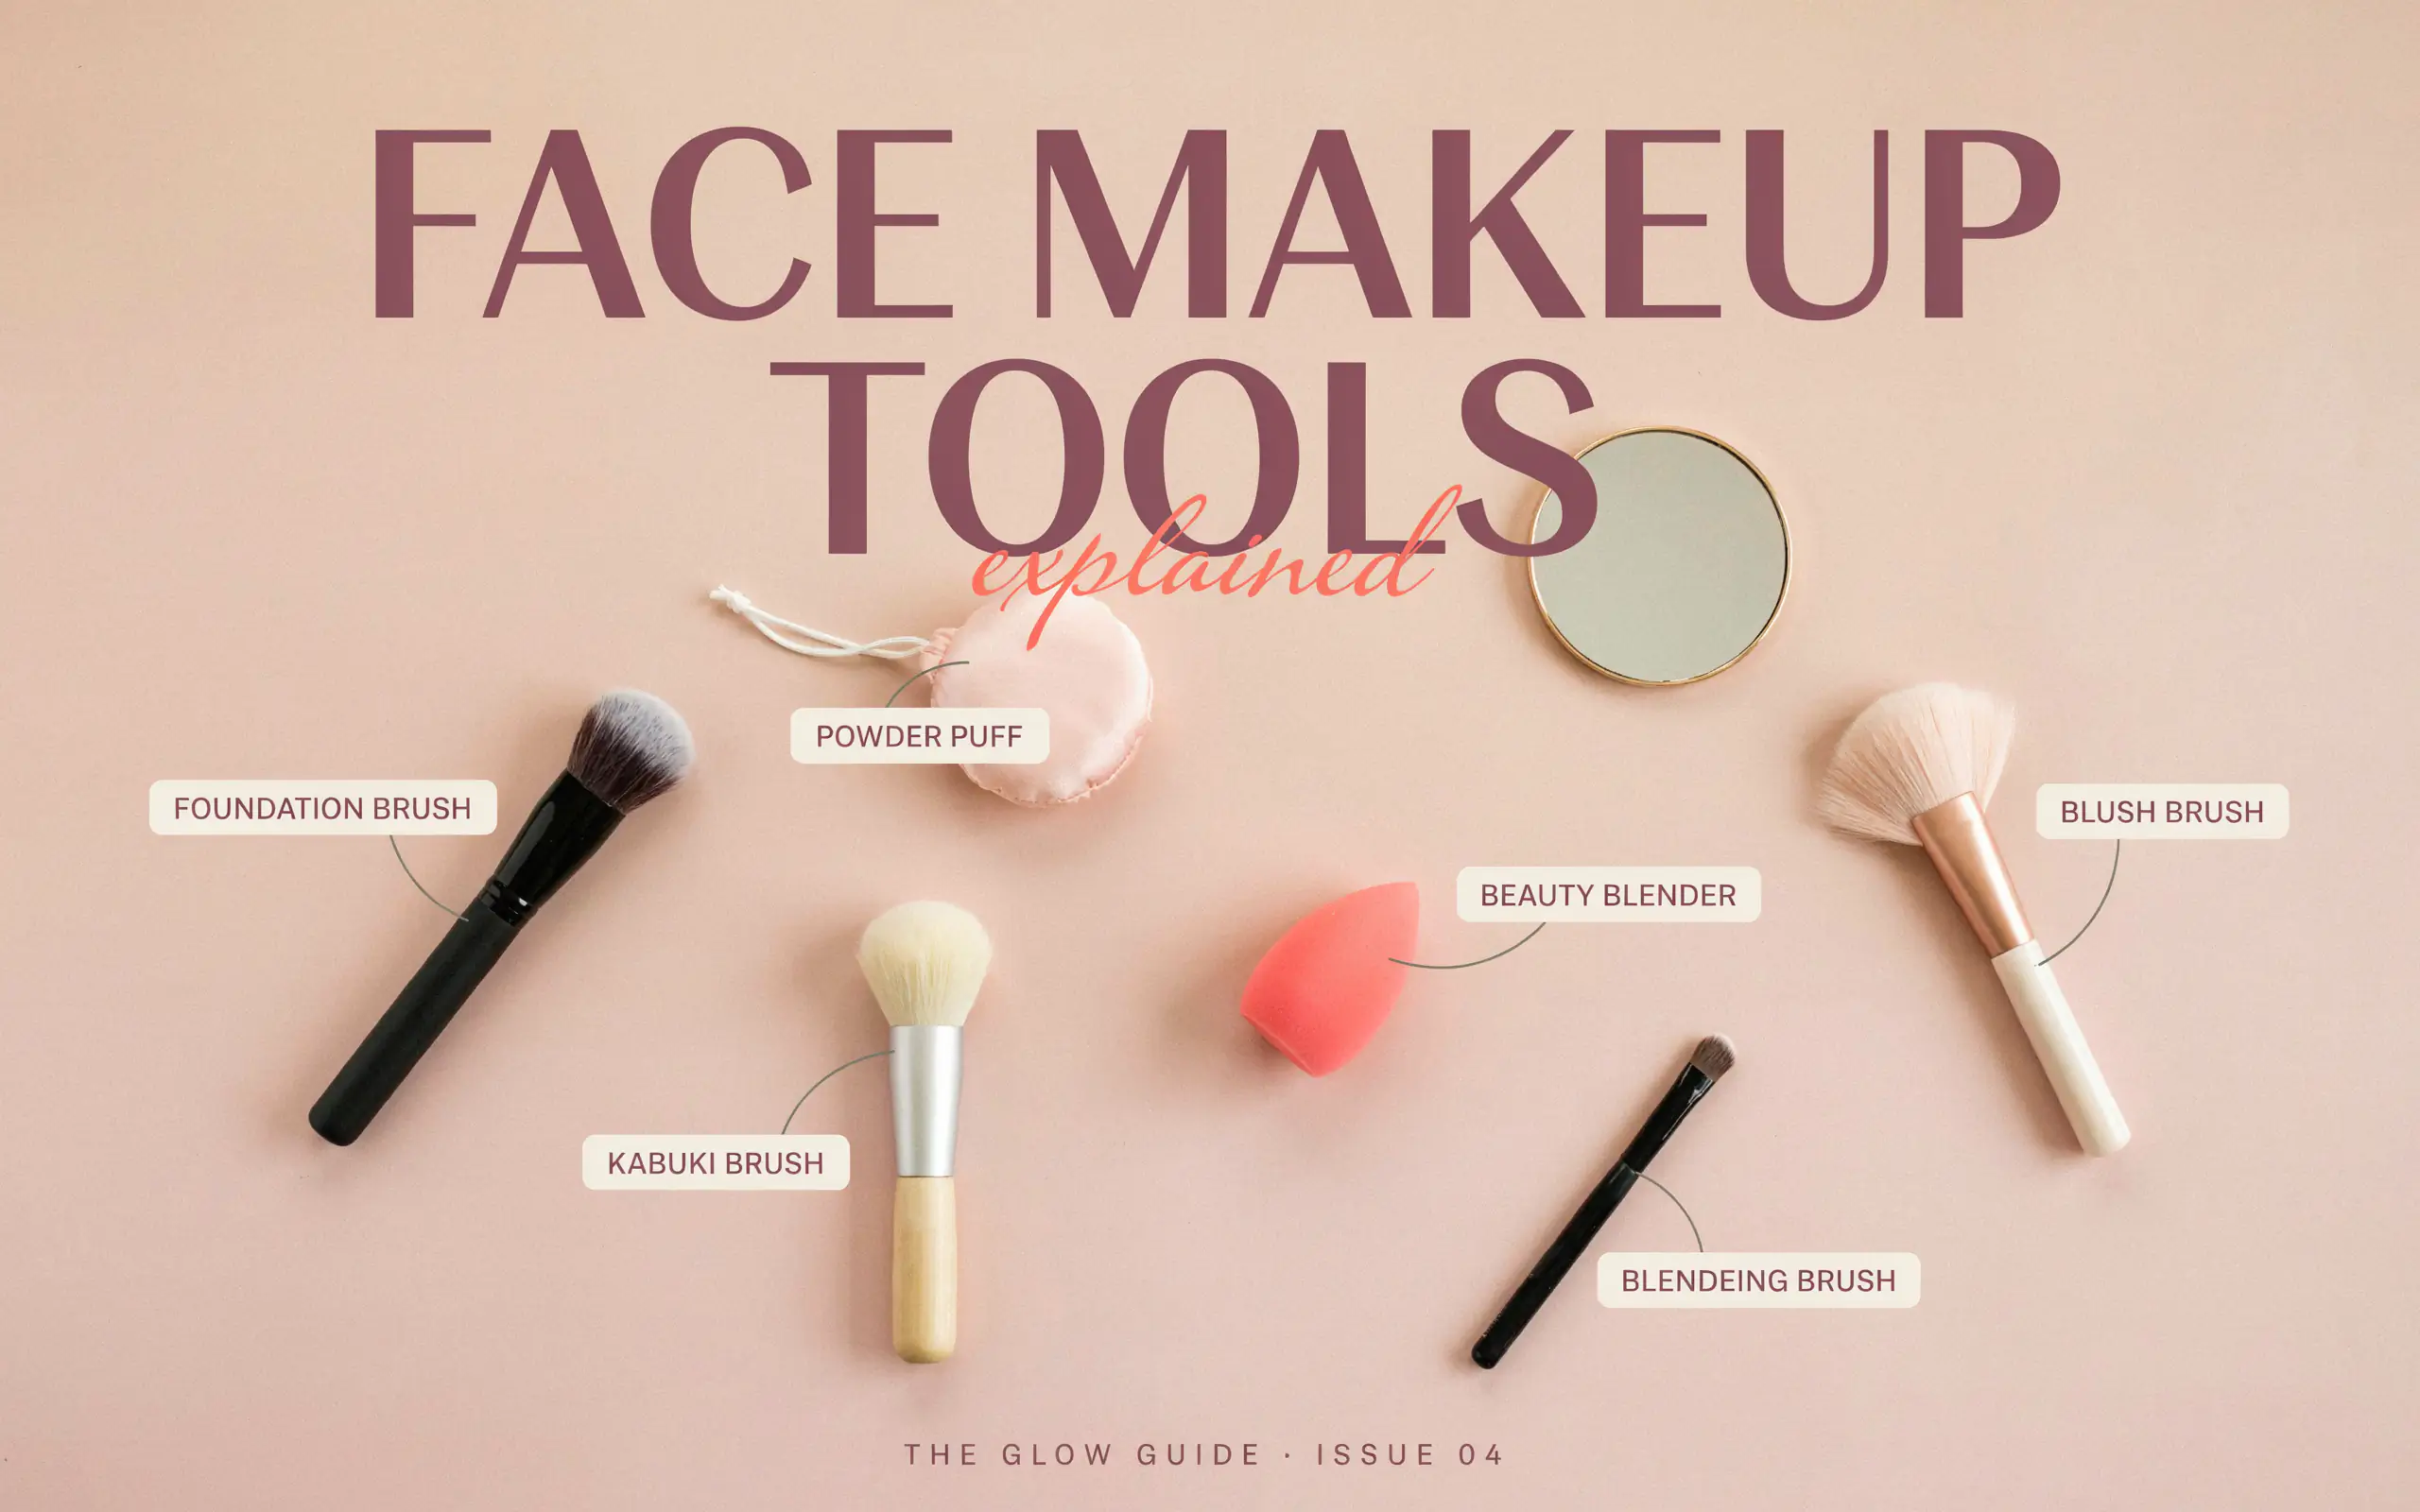
Struggling with which brush or sponge to use? This guide has face makeup tools explained for every step, from foundation to powder. Learn the types, uses, and care tips for perfect application.
Have you ever stood in front of a makeup aisle and felt completely lost? You see rows of brushes, sponges, and gadgets, and you have no idea what most of them do. It is a common feeling. Many people buy a brush set and only use one or two tools because they do not know what the rest are for.
This is where face makeup tools explained comes in handy. Knowing your tools is the first step to better makeup. When you know what each tool does, you can choose the right one for the product you are using. You also get the finish you want, whether that is full coverage or a natural glow.
This guide will break down everything you need to know. We will look at brushes, sponges, and other helpful tools. We will also talk about how to clean them and keep them in good shape. By the end, you will feel confident picking up any tool and using it like a pro.
Why Knowing Your Tools Matters
Using the right tool can change your whole makeup look. A good brush can make your foundation look smooth and even. A sponge can give you a dewy, skin-like finish. But using the wrong tool can leave you with streaks, patchy color, or wasted product.
Think of it like cooking. You would not use a butter knife to chop vegetables. You need the right knife for the job. The same goes for makeup. Each tool is made for a specific purpose. When you use it correctly, you get better results with less effort.
Many people give up on certain products because they do not apply well. But often, the problem is not the product. It is the tool. Once you have face makeup tools explained clearly, you can make better choices. You will also save money because you will not buy tools you do not need.
The Main Categories of Face Makeup Tools
Before we get into the details, let us look at the big picture. Face makeup tools fall into a few main groups.
Brushes
Brushes are the most common tools. They come in many shapes and sizes. Each shape serves a different purpose. Some brushes are flat, some are round, and some are angled. The bristles can be natural or synthetic.
Natural bristles come from animal hair. They are good for powder products because they pick up and hold powder well. Synthetic bristles are man-made. They work best with liquid and cream products. They do not absorb as much product, so you waste less.
Sponges
Sponges have become very popular in recent years. The most famous is the beauty blender. Sponges are great for blending. They give a natural, airbrushed finish. You usually use them damp. The water helps the sponge expand and stops it from soaking up too much product.
Other Tools
There are also other tools that do not fit into these two groups. These include things like eyelash curlers, tweezers, and powder puffs. They each have a specific job. We will cover the most important ones later.
Face Brushes: A Detailed Breakdown
Brushes are the backbone of any makeup kit. Let us look at the most common face brushes and what they do. This section will have face makeup tools explained in a way that is easy to remember.
Foundation Brushes
Foundation brushes help you apply liquid or cream foundation. There are a few different types.
Flat or Paddle Brushes have a flat, slightly rounded shape. They look like a paintbrush. These brushes give full coverage. You paint the foundation onto your skin in strokes. This brush is good for thick, full-coverage foundations. However, they can leave streaks if you are not careful.
Buffing Brushes have a dome shape with dense bristles. You use them in small, circular motions. This motion buffs the foundation into the skin. It gives a smooth, airbrushed finish with medium to full coverage. These brushes are great for blending and do not leave streaks.
Dual-Fiber Brushes have two layers of bristles. They have short black bristles at the base and longer white ones on top. These brushes give a light, sheer coverage. They are perfect for skin tints or when you want a very natural look. You can build up the coverage slowly.
Stippling Brushes are similar to dual-fiber brushes. They have a flat top. You use a bouncing or stippling motion to apply product. This gives a light, even layer. It is great for cream blushes and highlighters too.
Powder Brushes
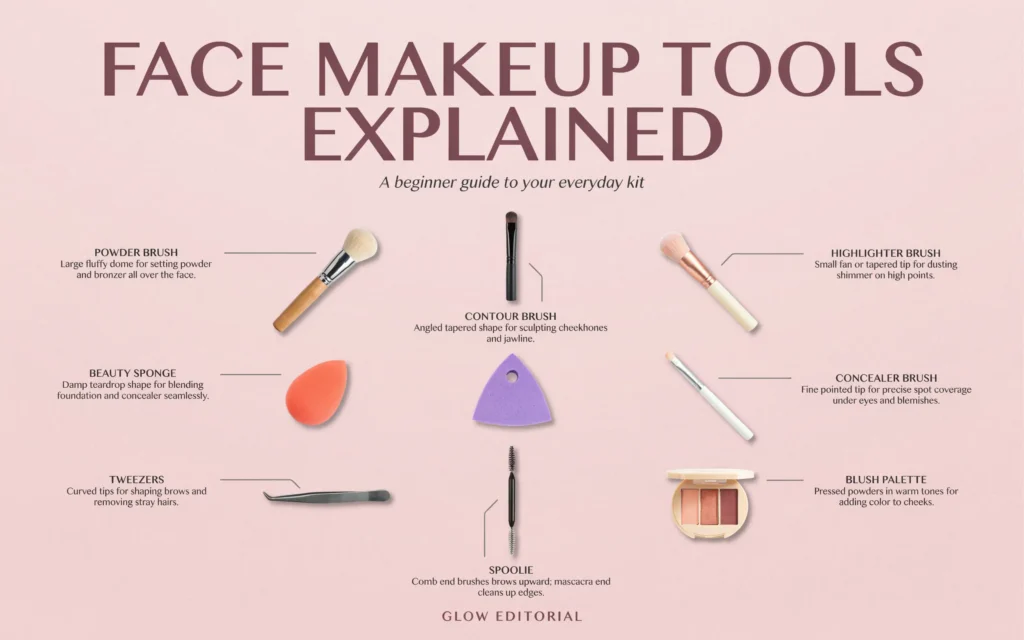
Powder brushes are large and fluffy. They are used to apply setting powder, bronzer, or blush. The large size covers a lot of area quickly. The fluffy bristles pick up powder easily and distribute it evenly.
To use a powder brush, swirl it in the product. Tap off any extra. Then, use circular motions or gentle sweeps to apply it to your face. This helps set your makeup and keeps it in place all day.
Blush and Bronzer Brushes
These brushes are usually medium-sized and slightly tapered. The tapered shape helps you place color exactly where you want it. You can use a blush brush for both blush and bronzer.
For blush, smile and apply the color to the apples of your cheeks. Blend it back toward your hairline. For bronzer, apply it to the hollows of your cheeks, your forehead, and your jawline. This adds warmth and shape to your face.
Contour Brushes
Contour brushes are often angled. The angle fits into the hollows of your cheeks and along your jawline. This makes it easier to create shadows and define your features.
Use a contour brush with a matte bronzer or contour powder. Apply the product in the hollows of your cheeks, along your hairline, and under your jawline. Blend well so there are no harsh lines.
Highlighter Brushes
Highlighter brushes come in a few shapes. One popular shape is the fan brush. A fan brush is thin and spread out. It applies a very light, subtle layer of highlighter. You sweep it over the high points of your face. These points are your cheekbones, the bridge of your nose, and your brow bone.
Another option is a small, tapered brush. This gives a more concentrated glow. You can place the highlighter exactly where you want it.
Concealer Brushes
Concealer brushes are small and flat. They are made for precise application. You use them to cover blemishes, dark circles, or any spots you want to hide.
The small size gives you control. You can place the concealer exactly on the area you want to cover. Then, you blend the edges so it disappears into your skin. Some people also use their fingers for concealer, but a brush gives a more precise finish.
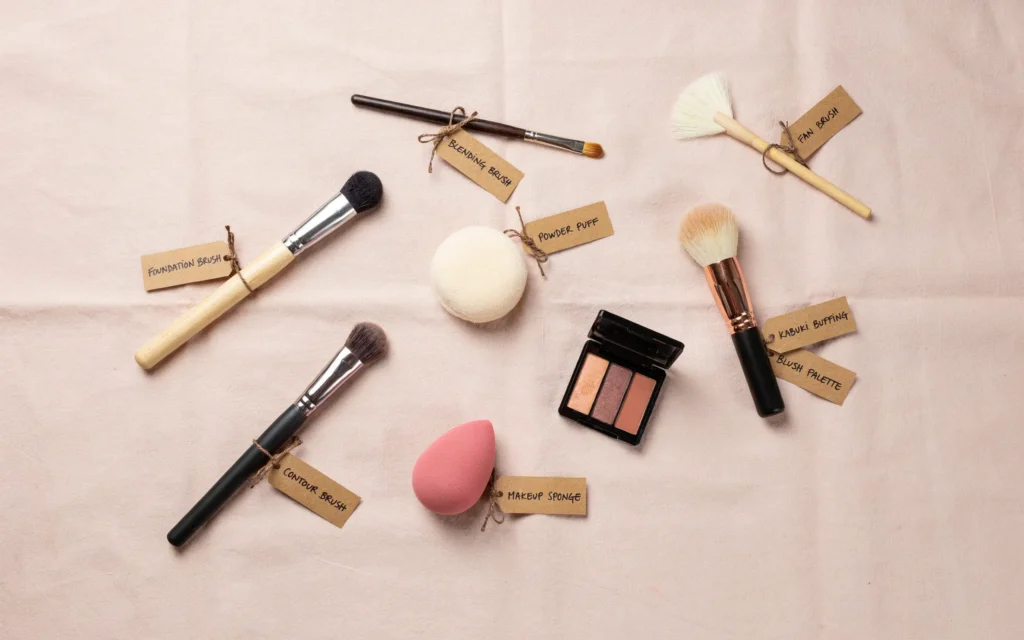
Makeup Sponges: Your Blending Best Friend
Sponges have changed the way many people apply foundation. They are soft, bouncy, and easy to use.
How to Use a Makeup Sponge
The key to using a sponge is to get it wet first. Run it under water and squeeze out the extra. The sponge will expand and become softer. This stops it from absorbing too much of your foundation.
Then, put some foundation on the back of your hand or directly on your face. Use the sponge to bounce the product into your skin. Do not drag or rub the sponge. Use a bouncing motion. This gives a smooth, streak-free finish.
Sponge vs. Brush: Which is Better?
This is a common question. The answer depends on what you want. A brush gives more control and fuller coverage. It lays down product with intention. A sponge gives a more natural, dewy finish. It diffuses the product and blends everything together.
Many makeup artists use both. They apply foundation with a brush for coverage. Then, they go over it with a damp sponge to blend and remove any streaks. This gives the best of both worlds.
Sponges do absorb some product. This means you might use a little more foundation. But the finish is often worth it. Brushes are more efficient with product because they do not absorb it.
Types of Sponges
The most famous sponge is the Beautyblender. It has a teardrop shape. The rounded bottom is for large areas like your cheeks and forehead. The pointed tip is for small areas like around your nose and under your eyes.
There are also many other shapes. Some are flat on one side. Some are shaped like a egg. They all do the same basic job. Choose the shape that feels comfortable in your hand.
Other Essential Face Makeup Tools
Brushes and sponges are the main tools. But there are a few other items that are very helpful.
Eyelash Curler
An eyelash curler is a simple but effective tool. It curls your lashes so they look longer and more open. You use it before you apply mascara.
To use it, place the curler at the base of your lashes. Squeeze gently for a few seconds. Then, move the curler to the middle of your lashes and squeeze again. This gives a natural curl.
Tweezers
Tweezers are for shaping your eyebrows. They are also good for removing any stray hairs. Good tweezers have a slanted tip. This gives you better control. You can grab hairs more easily.
Spoolie Brush
A spoolie brush looks like a mascara wand but without the product. It is used to brush your eyebrows into place. It also helps blend brow products like pomade or powder. This gives a more natural look.
Powder Puff
A powder puff is a soft, round pad. You use it to apply setting powder. It presses the powder into your skin. This gives a more matte finish. It is also good for baking, which is a technique where you leave powder on your face for a few minutes before brushing it off.
How to Choose the Right Tools for Your Needs
With so many options, how do you choose? Start with the basics. You do not need every brush on the market. A small, good-quality set is better than a large, poor-quality one.
For Beginners
If you are new to makeup, start with these tools:
- A foundation brush or sponge
- A powder brush
- A blush brush
- An eyeshadow blending brush
- An angled brush
This small set covers your basic needs. You can apply foundation, powder, blush, and simple eye looks. As you get more comfortable, you can add more tools.
For Different Products
Think about the products you use most. If you use liquid foundation, get a buffing brush or a sponge. If you use powder foundation, get a dense powder brush.
For cream products like blush or bronzer, synthetic brushes work best. They pick up the cream and blend it smoothly. For powder products, natural bristles are a good choice. They pick up powder well.
Quality Matters
Good tools last longer and work better. Cheap brushes can shed bristles. They can also feel scratchy on your skin. Investing in a few good brushes is worth it. They will give you better results and save you money in the long run.
Here is a quick comparison of brush types based on bristle material:
| Bristle Type | Best For | Pros | Cons |
|---|---|---|---|
| Natural | Powder products | Picks up powder well, applies evenly | Can be expensive, not vegan |
| Synthetic | Liquid and cream products | Does not absorb product, blends smoothly, vegan | May not pick up powder as well |
| Dual-Fiber | Sheer coverage, skin tints | Gives a light, natural finish | Not good for full coverage |
Proper Care and Cleaning of Your Tools
Cleaning your tools is very important. Dirty brushes can cause breakouts. They can also make your makeup look muddy. Old product builds up on the bristles. This affects how the brush works.
How Often to Clean
You should clean your brushes at least once a week. This is especially important for foundation and concealer brushes. These brushes get the most product buildup. Powder brushes can be cleaned every two weeks.
Sponges need to be cleaned after every use. They hold a lot of moisture and product. This makes them a breeding ground for bacteria. Wash them with soap and water after each use.
How to Clean Brushes
Cleaning brushes is easy. Here is a simple method:
- Rinse the bristles under lukewarm water. Keep the bristles pointing down. This stops water from getting into the handle.
- Put a drop of mild soap or brush cleaner in your palm.
- Swirl the brush in the soap. Use your fingers to work the soap into the bristles.
- Rinse the brush under water until the water runs clear.
- Gently squeeze out extra water. Reshape the bristles.
- Lay the brush flat on a towel to dry. Do not stand it upright. Water can drip into the handle and loosen the glue.
How to Clean Sponges
To clean a sponge, wet it with water. Add some soap or sponge cleaner. Squeeze and massage the sponge until the water runs clear. Rinse well. Squeeze out the extra water and let it air dry.
Here is a quick guide for cleaning frequency:
| Tool | Cleaning Frequency | Why |
|---|---|---|
| Foundation Brush | Weekly | Prevents breakouts, keeps brush working well |
| Powder Brush | Every 1-2 weeks | Removes old powder, keeps bristles soft |
| Makeup Sponge | After each use | Stops bacteria growth, prevents product buildup |
| Eyeshadow Brushes | Weekly | Prevents color mixing, keeps brushes clean |
Makeup artist and educator Bobbi Brown once said, “Clean brushes are the key to good makeup. Dirty brushes can ruin your look and your skin.” This is a simple truth that many people overlook.
Common Mistakes and How to Avoid Them
Even with good tools, you can make mistakes. Here are some common ones and how to fix them.
Using the Wrong Tool for the Product
This is the most common mistake. Using a powder brush for liquid foundation will not work well. The brush will soak up the product. It will also leave streaks.
Always match your tool to your product. Use synthetic brushes for liquids and creams. Use natural bristles for powders. This simple rule will improve your application.
Not Cleaning Your Tools
Dirty tools are bad for your skin. They can cause acne and irritation. They also do not work as well. Old product makes the bristles stiff. This makes it harder to blend.
Clean your tools regularly. It only takes a few minutes. Your skin will thank you.
Using Too Much Product
It is easy to use too much product. This is especially true with foundation. Start with a small amount. You can always add more. It is harder to take product away.
With a brush, use a small drop of foundation. Buff it into your skin. Add more if you need it. With a sponge, put the foundation on the sponge or your face. Bounce it in. Build up the coverage slowly.
Rubbing Instead of Bouncing
Many people rub when they should bounce. This is especially true with sponges. Rubbing can move your foundation around. It can also make your skin red.
Use a bouncing or stippling motion with a sponge. This presses the product into your skin. It gives a smooth, even finish. With a brush, use circular or sweeping motions. Do not drag the brush across your skin.
Frequently Asked Questions
What are the most essential face makeup tools for a beginner?
For a beginner, the most essential tools are a foundation brush or sponge, a powder brush, a blush brush, and an angled brush. These cover your basic needs. You can apply foundation, powder, blush, and simple eye looks with these. As you get more comfortable, you can add more specialized tools.
Can I use my fingers instead of tools?
Yes, you can use your fingers. Many people do. Fingers are convenient and free. The warmth of your fingers can help melt products into your skin. However, tools give a more even and professional finish. They also keep your hands clean. Using a brush or sponge is often more hygienic.
How do I know if a brush is good quality?
A good brush feels soft on your skin. It should not shed bristles. The handle should feel solid and comfortable in your hand. The ferrule, which is the metal part connecting the bristles to the handle, should be tight. Cheap brushes often have loose ferrules. The bristles should also be evenly shaped.
Is it better to use a brush or a sponge for foundation?
It depends on the finish you want. A brush gives more coverage and control. It is good for a full-glam look. A sponge gives a more natural, dewy finish. It is great for everyday wear. Many people use both. They apply with a brush and blend with a sponge.
How often should I replace my makeup tools?
Brushes can last for years if you take care of them. Clean them regularly and store them properly. Sponges should be replaced every three months. They break down over time. They can also hold bacteria even with cleaning. Replace your sponge when it starts to tear or lose its shape.
Celebrity makeup artist Mario Dedivanovic shared, “The right tool can make an average product look amazing, and the wrong tool can make a great product look terrible.” This is a valuable reminder. Your tools are just as important as your products.
Another expert, makeup artist Pat McGrath, once said, “Makeup is art, and brushes are your paintbrushes. Choose them wisely and care for them well.” This is a beautiful way to think about your tools. They are your instruments for creating your look.
Conclusion
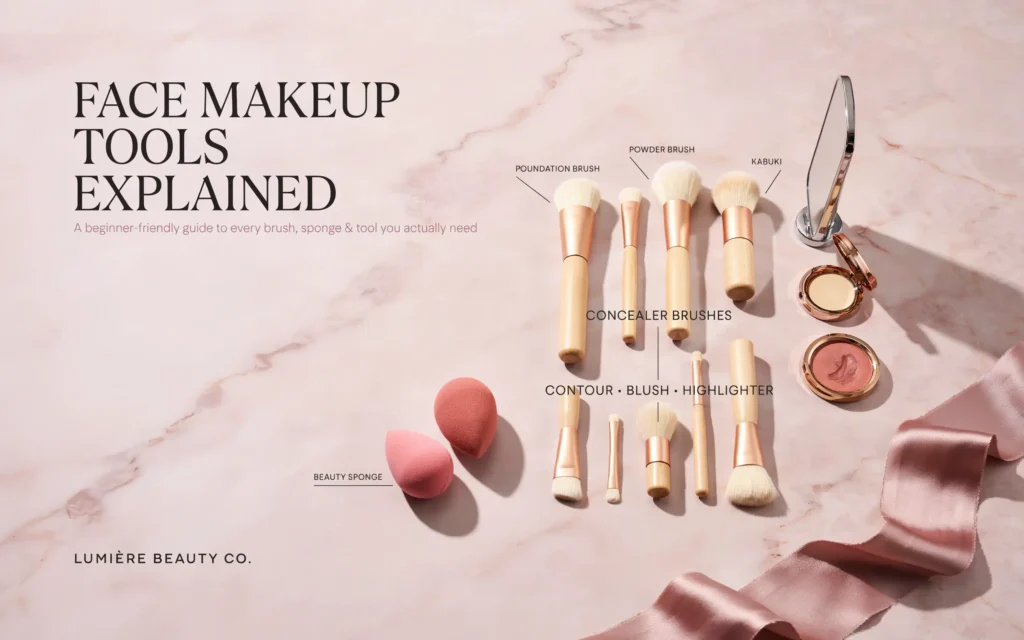
Understanding your tools is a game-changer for your makeup routine. When you have face makeup tools explained clearly, you can make better choices. You can choose the right brush for your foundation. You can pick the right sponge for a natural finish. You can keep your tools clean and working well.
Start with the basics. Get a good foundation brush or sponge, a powder brush, and a blush brush. Add more tools as you need them. Remember to clean your tools regularly. This protects your skin and makes your tools last longer.
Do not be afraid to experiment. Try different tools and techniques. See what works best for you. Everyone’s skin and preferences are different. What works for one person might not work for another.
The most important thing is to have fun. Makeup is a form of self-expression. It is a way to show your creativity. With the right tools, you can achieve any look you want. So go ahead, explore your options, and enjoy the process.
Now you have a complete guide on face makeup tools explained. You know the different types, their uses, and how to care for them. This knowledge will help you create beautiful makeup looks with confidence. Whether you are a beginner or a pro, the right tools make all the difference.
Related posts
 Best Compact Powder for Women: 2026 Buyer Guide
Finding the best compact powder for women in 2026. We compare top-rated matte, mineral, and lightweight pressed powders to help you choose the right finish. Finding…
 Best Casual Wear for Women: 2026 Style and Comfort Essentials
Discover the best casual wear for women in 2026. We compare top-rated trousers and versatile tops to help you build a comfortable, stylish everyday wardrobe. Finding…
 Best Claw Clips for Thick Hair in 2026
Finding the best claw clips for thick hair requires a balance of grip and size. Explore our top 2026 recommendations for secure, stylish, and reliable styling.…