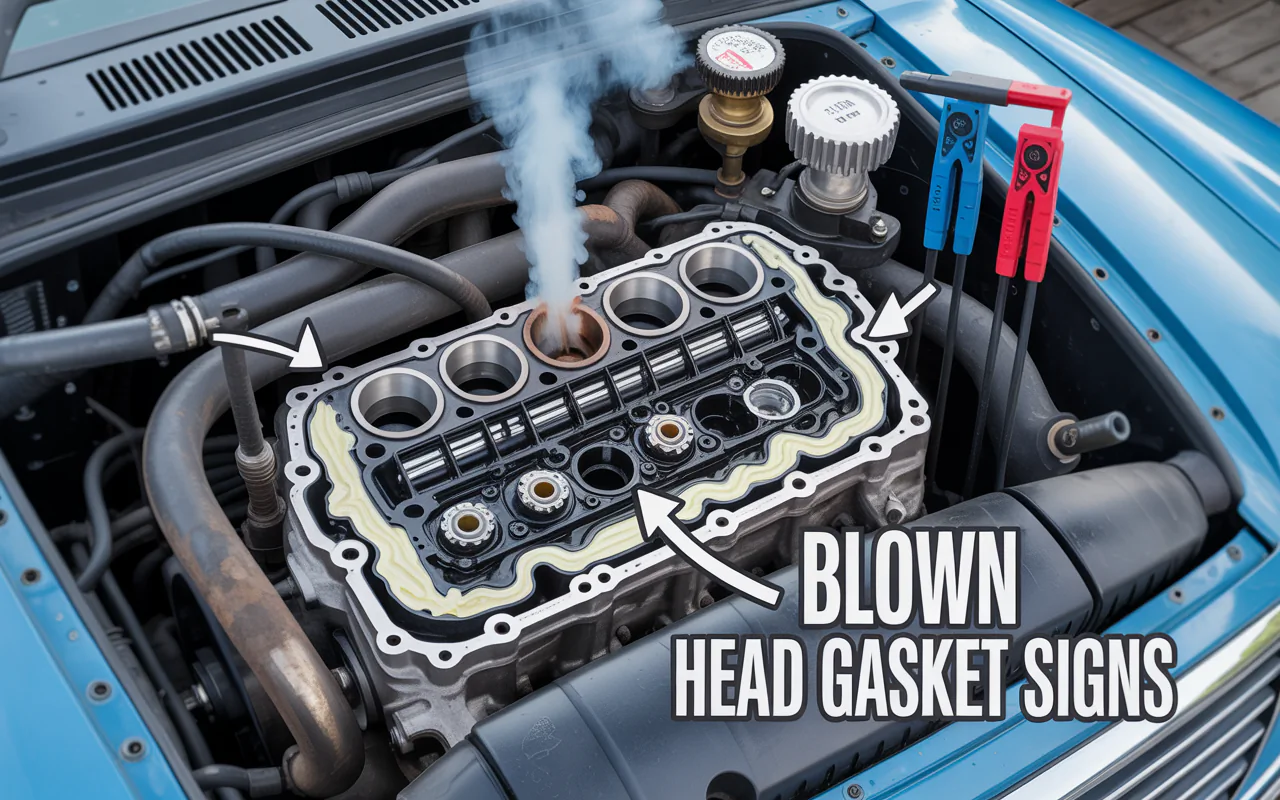
How To Check For Blown Head Gasket
Learn how to check for blown head gasket using simple home tests. This guide shows you signs, fluid checks, and a compression test for a clear answer.
A blown head gasket sounds like a scary problem. And yes, it can be serious. But you do not need to panic right away. The first smart step is to learn how to check for blown head gasket symptoms at home. Many drivers catch this issue early and save their engine. I have been helping friends and family with car problems for years. I want to share what actually works. No fancy tools are required for most of these checks. Just your eyes, a bit of time, and some basic care. Let us walk through this together. By the end, you will know exactly what to look for and what to do next.
How to Check for Blown Head Gasket – 6 Reliable Methods
When you suspect a head gasket failure, you need clear steps. A head gasket seals the engine block and cylinder head. It keeps coolant, oil, and combustion gases separate. When it fails, these fluids mix. That leads to overheating, white smoke, and engine damage. But here is the good news. You can run several simple tests before going to a mechanic. These methods are safe, cheap, and effective. Let me show you how to check for blown head gasket using six reliable techniques.
First, Know the Common Warning Signs
Before any test, listen to your car. Your vehicle often gives clues. Watch for these signs:
- White smoke from the exhaust that smells sweet
- Engine overheating for no clear reason
- Loss of coolant without any visible leak
- Milky oil on the dipstick (looks like a chocolate milkshake)
- Bubbles in the radiator or coolant overflow tank
If you see even one of these, it is time to learn how to check for blown head gasket properly. Do not ignore them. Small issues become big repairs.
Method 1 – The Visual Coolant and Oil Check
This is the easiest test. Pop the hood when the engine is cold. Never open a hot radiator. First, pull out the engine oil dipstick. Wipe it with a clean cloth. Look at the color. Normal oil is amber or dark brown. If you see a creamy, light brown sludge, that is coolant mixed with oil. That is a strong sign of a blown head gasket.
Next, check the radiator cap. Look inside the radiator or coolant reservoir. Do you see oil floating on top? Oil in coolant looks like a greasy film or rainbow colors on the surface. Also check for rust colored deposits. These form when exhaust gases enter the cooling system.
“Most head gasket failures start with a small leak. The key is catching it before the engine overheats badly. A simple visual check every month can save you thousands.” – Robert L., ASE Master Mechanic
Method 2 – The White Smoke Test
How To Check For Blown Head Gasket. Start your car and let it idle. Look at the exhaust pipe. A little white vapor on a cold morning is normal. That is just condensation. But thick white smoke that keeps coming after the engine warms up is a problem. This smoke often smells sweet like pancake syrup. That is burning coolant. When a head gasket fails, coolant enters the cylinders. It burns and turns into steam. This steam leaves as white smoke. If you see this, you likely have a head gasket issue.

Table 1 – Normal vs. Blown Head Gasket Symptoms
| Symptom | Normal Engine | Possible Blown Head Gasket |
|---|---|---|
| Exhaust smoke | Light gray or clear | Thick white, sweet smell |
| Oil color | Amber to dark brown | Milky, creamy, light brown |
| Coolant level | Stable | Drops without visible leak |
| Engine temp | Steady | Frequent overheating |
| Radiator bubbles | None | Constant bubbles with cap off |
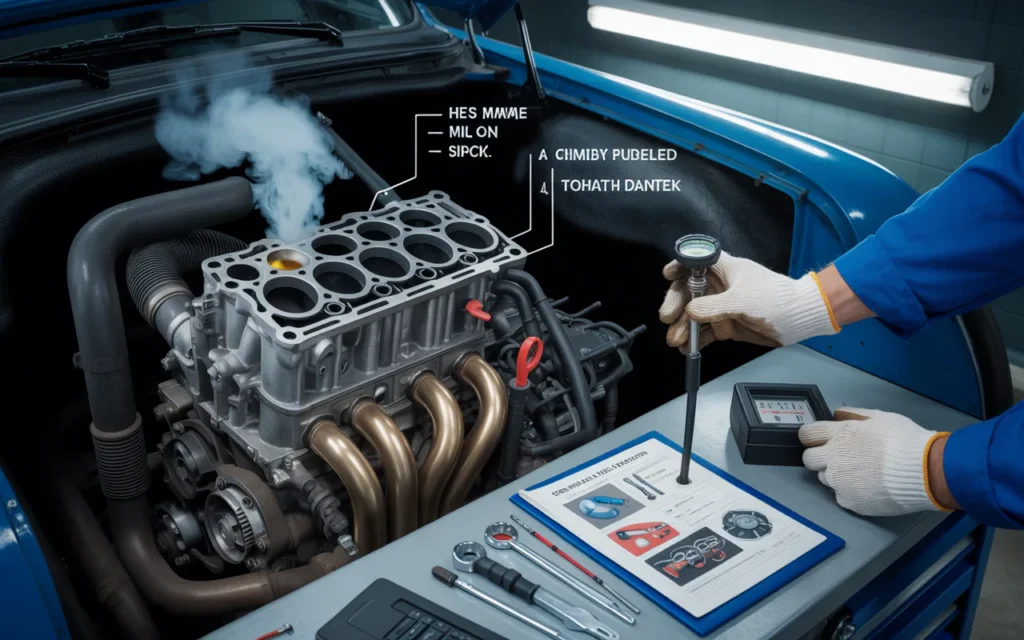
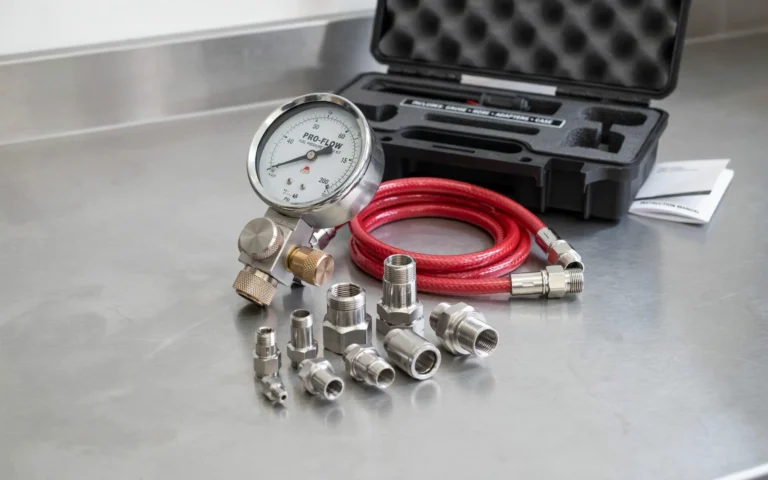
Method 3 – The Compression Test
This test tells you if each cylinder holds pressure. You will need a compression tester tool. You can rent one from an auto parts store for free or buy it for about $30. Here is how to check for blown head gasket using compression:
- Remove all spark plugs.
- Screw the compression tester into the first spark plug hole.
- Ask a friend to crank the engine for a few seconds.
- Write down the reading.
- Repeat for each cylinder.
What do the numbers mean? All cylinders should be close to each other. Usually within 10 to 15 percent. If you see two adjacent cylinders with low compression, that is a classic sign. For example, cylinder 3 reads 120 psi and cylinder 4 reads 90 psi. That suggests the head gasket failed between those two cylinders.
Method 4 – The Leak Down Test
A leak down test is more detailed. It uses compressed air to find exactly where pressure escapes. You need a leak down tester for this. Attach it to each cylinder with the piston at top dead center. Then listen for air. If you hear air hissing from the exhaust, you have a leak at the exhaust valve. Hissing from the intake means an intake valve leak. But here is the key for a head gasket. If you see bubbles in the radiator while doing this test, air is going from the cylinder into the coolant. That confirms a blown head gasket.
This test takes about 30 minutes. It is very accurate. Many mechanics call it the gold standard.
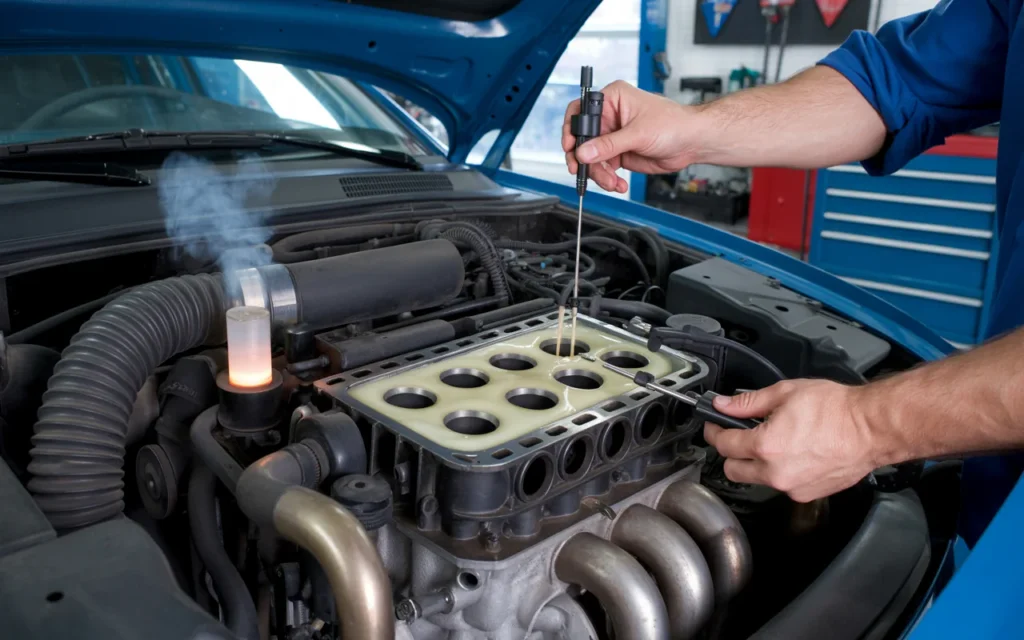
Method 5 – The Combustion Leak Detector Test
This is my favorite method for how to check for blown head gasket. It is simple and gives a clear yes or no answer. You buy a combustion leak detector kit. It costs around $40 to $50. The kit comes with a blue liquid. Here is what you do:
- Start the engine and let it warm up.
- Remove the radiator cap.
- Place the tester on the radiator opening.
- Add the blue liquid to the tester.
- Squeeze the bulb to pull air from the radiator through the liquid.
How To Check For Blown Head Gasket. If the liquid turns yellow, exhaust gases are present in the coolant. That means the head gasket has failed. If the liquid stays blue, your head gasket is likely fine. This test works because the liquid reacts to carbon dioxide from combustion. It is fast, accurate, and easy for anyone to do.
“I have used combustion leak testers on hundreds of cars. They are never wrong. If that fluid turns yellow, you have a blown head gasket. No question about it.” – Maria S., Auto Shop Owner for 15 years
Table 2 – Test Methods Compared
| Test Method | Time Needed | Cost | Accuracy | Difficulty |
|---|---|---|---|---|
| Visual fluid check | 5 minutes | Free | Medium | Very easy |
| White smoke test | 2 minutes | Free | Medium | Very easy |
| Compression test | 30 minutes | $30 | High | Medium |
| Leak down test | 30 minutes | $50 | Very high | Hard |
| Combustion leak test | 15 minutes | $40 | Very high | Easy |
Method 6 – The Radiator Bubble Test
How To Check For Blown Head Gasket. This is an old school method, but it works. It is best for a cold engine. Remove the radiator cap. Start the engine. Look into the radiator opening. Do you see bubbles rising? Some small bubbles at startup can be normal. But constant bubbling while the engine runs is a problem. Rev the engine a little. If more bubbles appear, exhaust gas is pushing into the coolant. That confirms a head gasket failure.
Be careful with this test. Hot coolant can burn you. Only do this on a cold engine. And never remove the cap from a hot radiator.
What If All Tests Are Normal But I Still See Symptoms?
How To Check For Blown Head Gasket. Sometimes you do everything right. All tests come back normal. Yet your car still overheats or loses coolant. What then? You might have a different problem. A cracked cylinder head can act like a blown head gasket. A cracked engine block can too. Also check for a leaking intake manifold gasket. This can cause coolant to enter the engine without a head gasket failure.
In rare cases, you have a warped cylinder head. This happens after overheating. The head does not sit flat anymore. That creates a leak even with a new gasket. A machine shop can check and fix this.
“Not every overheating issue is a head gasket. I have seen bad water pumps, clogged radiators, and broken fans all mimic the same signs. Do your tests before you tear the engine apart.” – James T., Automotive Engineer
How Much Does Head Gasket Repair Cost?
This is the question everyone asks. The repair cost varies a lot. For a small four cylinder engine, expect $1,000 to $1,500. For a V6 or V8 engine, it can be $1,500 to $3,000. The parts are cheap. A head gasket itself costs $50 to $200. But the labor is high. A mechanic must remove many parts to reach the gasket. It takes 8 to 15 hours of work. If the cylinder head needs machining, add another $200 to $400.
Can you do it yourself? Yes, if you have mechanical skill. But it is a big job. You need a torque wrench, engine hoist for some cars, and a good repair manual. Watch several video guides first. And be ready for a full weekend of work.
Preventing a Blown Head Gasket
The best repair is prevention. You can avoid this problem with simple habits. First, never let your engine overheat. If the temperature gauge goes up, pull over safely. Turn off the engine. Let it cool. Overheating is the number one cause of head gasket failure. Second, change your coolant every two years. Old coolant becomes acidic. It eats away at gaskets. Third, check your oil level monthly. Low oil leads to more heat. Fourth, fix small coolant leaks right away. A slow leak today becomes a big problem tomorrow.
Also use a good quality coolant. Mix it 50/50 with distilled water. Tap water has minerals that clog the cooling system. And replace your radiator cap every few years. A bad cap can cause pressure problems that stress the head gasket.
Frequently Asked Questions
Q1: Can I drive with a blown head gasket?
You should not. Driving with a blown head gasket can destroy your engine. Coolant can enter the cylinders and cause hydrolock. That bends connecting rods. Or the engine can overheat so badly that the cylinder head cracks. If you must drive, go only a short distance to a repair shop.
Q2: How to check for blown head gasket without any tools?
Use your senses. Look for milky oil on the dipstick. Smell the exhaust for a sweet odor. Watch for constant bubbles in the radiator. Check for white smoke that does not stop. These four checks require no tools at all.
Q3: Will a blown head gasket always show white smoke?
No, not always. A small leak may not produce visible white smoke. The coolant burns off inside the engine. You might only see slow coolant loss or occasional overheating. That is why you should use multiple tests.
Q4: How accurate is the combustion leak detector test?
It is very accurate, nearly 100 percent. The liquid chemical reacts specifically to carbon dioxide from exhaust gases. No other gas causes the color change. Many professional mechanics trust this test completely.
Q5: Can a blown head gasket fix itself?
No, it never fixes itself. A head gasket is a physical part. Once it breaks, it stays broken. Do not use any “head gasket sealer” bottles from auto stores. These products often clog your radiator and heater core. They cause more damage than help.
Q6: How long can I wait to fix a blown head gasket?
Do not wait longer than a few days. Every mile you drive with a bad head gasket causes more damage. The repair cost goes up the longer you wait. A simple gasket replacement can turn into a full engine replacement.
Q7: What is the cheapest way to check for blown head gasket?
The visual oil and coolant check is free. Just open your hood and look. Check the dipstick and radiator. This takes two minutes and costs nothing. It catches many head gasket failures early.
Q8: Why does my car overheat only sometimes with a bad head gasket?
Small head gasket leaks are inconsistent. The leak opens when the engine is hot and under load. It seals slightly when cold. That is why overheating happens on hills or highways. Not during short local trips.
Conclusion
Learning how to check for blown head gasket is a valuable skill. It saves you from guessing and from unnecessary repairs. You now know six methods. Start with the free visual checks. Look at your oil and coolant. Watch the exhaust smoke. If you see warning signs, move to the combustion leak detector test. That gives you a clear answer. Remember that a blown head gasket is serious but not always the end of your engine. Catch it early, and the repair is manageable. Prevent it with good cooling system care. Change your coolant, fix leaks fast, and never let the engine overheat. Your car will thank you with many more miles of reliable service. If you are unsure after doing these tests, take your car to a trusted mechanic. A second pair of eyes never hurts. Stay safe on the road and keep learning about your car. You are more capable than you think.
Related posts
 Best Automotive Inspection Mirror: Find Hidden Issues with Ease
Discover the best automotive inspection mirrors for mechanics and DIYers. Compare top telescoping, lighted, and magnetic tools to find hidden car problems. Automotive inspection mirrors are…
 Best Automotive Smoke Machine Leak Detector for DIY and Shop Use
Find the best automotive smoke machine leak detector for your needs. Compare top models for EVAP, vacuum, and pipeline leaks to make an informed choice. A…
 Best Fuel Pressure Tester Kit for Accurate Vehicle Diagnostics
Find the best fuel pressure tester kit for your car, truck, or motorcycle. Compare top options to accurately diagnose fuel system issues. A reliable fuel pressure…