
How to Test Car Wiring for Continuity Using a Multimeter
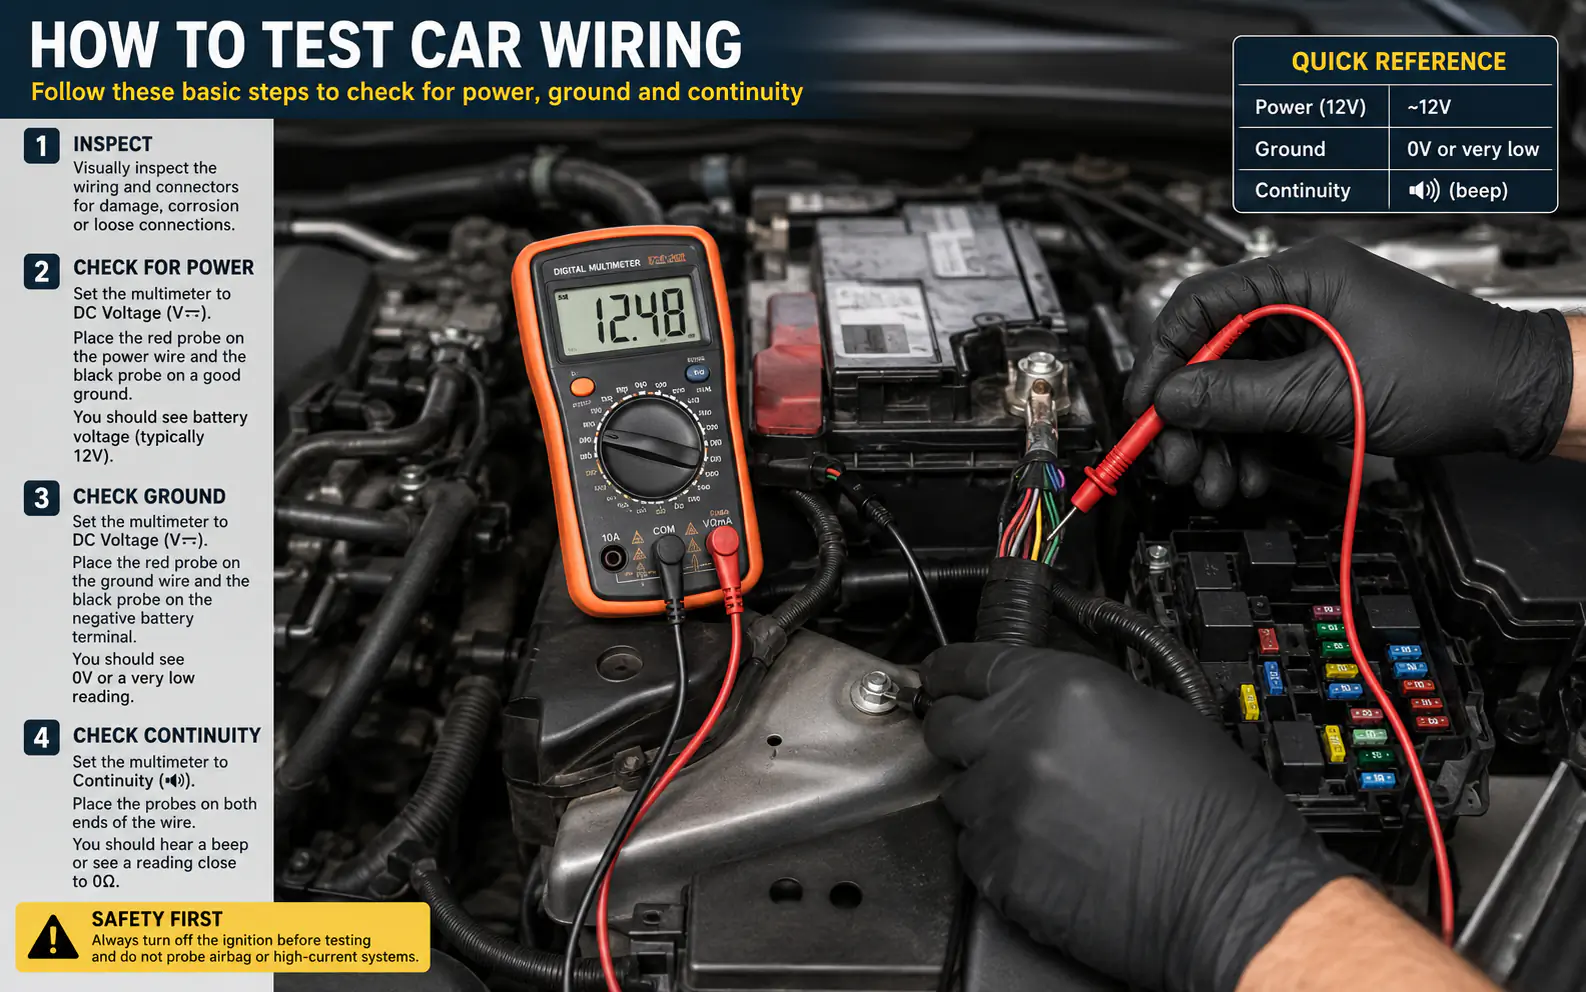
Testing car wiring for continuity is the most reliable way to find broken wires, corroded connectors, or failed switches in your vehicle. Continuity simply means that an electrical current can flow freely from one end of a wire to the other without interruption.
To test car wiring for continuity, you must first disconnect the vehicle’s battery to ensure there is no live voltage in the circuit. Next, set your digital multimeter to the continuity mode, which is usually represented by a sound wave or diode symbol.
Safety checks
- Always disconnect the vehicle battery before performing continuity tests to protect your multimeter.
- Continuity means an unbroken electrical path; a beep or a reading near zero ohms confirms a good wire.
- An ‘OL’ (Open Loop) reading indicates a broken wire, a blown fuse, or a disconnected plug.
- Never force thick multimeter probes directly into female connector terminals, as this stretches and ruins the metal contacts.
| Topic | When it helps | What to keep in mind |
|---|---|---|
| Step 1 | Every automotive electrical test. | Failing to disconnect the battery can ruin your multimeter or trigger airbag fault codes. |
| Step 2 | Verifying meter functionality. | Dirty or loose probe tips can cause unstable readings. |
| Step 3 | Locating breaks in a single wire run. | Do not touch the metal probe tips with your bare fingers during the test, as your body can conduct the signal and give a false positive. |
| Step 4 | Diagnosing circuit health. | A high resistance reading (such as 50 ohms or more) without a beep indicates a damaged, corroded, or partially broken wire. |
Focus strictly on testing continuity
Step 1. Isolate the Circuit and Disconnect Power
Before touching any wires with your multimeter, turn off the vehicle’s ignition and disconnect the negative battery terminal. Multimeters send a tiny amount of their own current to test continuity.
- Every automotive electrical test.
- Failing to disconnect the battery can ruin your multimeter or trigger airbag fault codes.
- Locate the negative battery cable, loosen the nut with a wrench, and pull the terminal completely off the post.
- Action – Disconnect negative battery terminal.
- Risk Level – High if skipped.
- Tool Needed – Wrench or socket set.
Step 2. Set Up and Calibrate Your Multimeter
Turn the dial on your digital multimeter to the continuity setting, which looks like a small speaker icon or sound wave symbol. If your meter does not have a dedicated sound setting, turn the dial to the lowest resistance setting (measured in ohms, represented by the Ω symbol).
- Verifying meter functionality.
- Dirty or loose probe tips can cause unstable readings.
- When the probes touch, you should hear a clear, continuous beep, and the screen should display 0.0 to 0.2 ohms.
- Meter Setting – Continuity (Sound Icon) or Low Ohms.
- Expected Calibration Reading – 0.0 to 0.2 ohms.
- Sound Indicator – Continuous beep.
Step 3. Connect the Probes to the Wire Ends
Place one probe on the clean metal terminal at the beginning of the wire you want to test. Place the second probe on the metal terminal at the far end of the same wire.
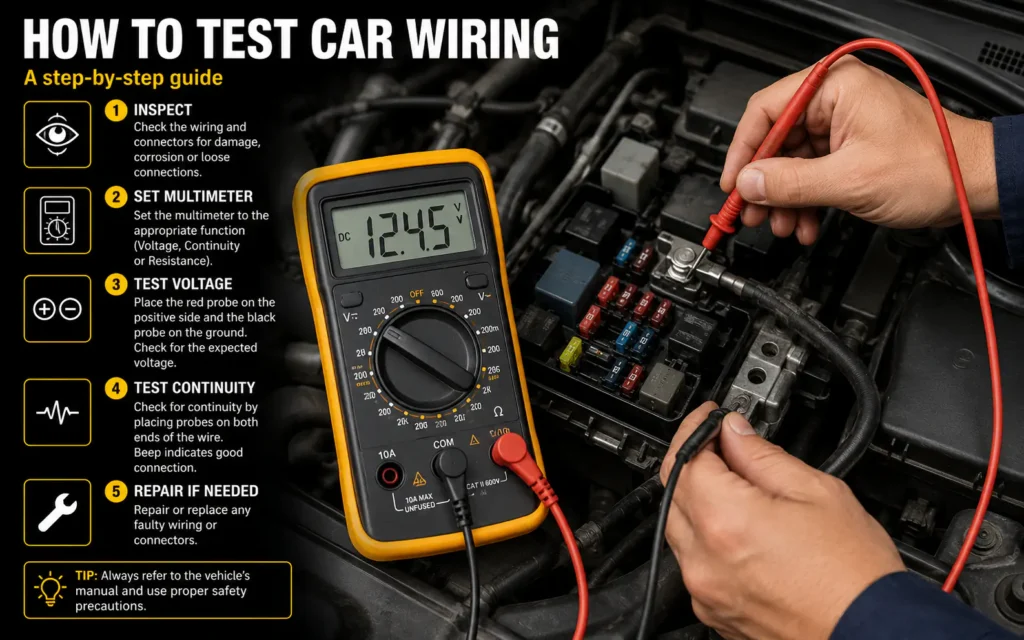
- Locating breaks in a single wire run.
- Do not touch the metal probe tips with your bare fingers during the test, as your body can conduct the signal and give a false positive.
- If the wire spans from the engine bay to the dashboard, use a jumper wire to extend one end of the wire closer to your meter.
- Probe Placement – One probe on each end of the wire.
- Polarity – Does not matter.
- Helper Tool – Jumper wire for long distances.
Step 4. Read and Interpret the Multimeter Screen
Observe the multimeter screen and listen for the audio tone. A solid beep and a screen reading near zero ohms mean the wire is fully intact.
- Diagnosing circuit health.
- A high resistance reading (such as 50 ohms or more) without a beep indicates a damaged, corroded, or partially broken wire.
- If you get an OL reading, inspect the wiring harness physically at common friction points, sharp bends, or near hot engine parts.
- Beep + Low Ohms – Good wire (Continuity).
- No Beep + OL – Broken wire (No Continuity).
- High Ohms (No Beep) – Corroded or damaged wire.
Preparing Your Vehicle Safely for Electrical Testing
Automotive electrical systems are highly sensitive. Modern vehicles rely on interconnected computer modules that communicate using low-voltage signals.
Isolating the circuit ensures that you are only measuring the physical wire itself, rather than measuring through a light bulb filament, a relay coil, or a control module. If you leave components connected, the electrical current from your meter might find an alternative path through another device, giving you a false continuity reading when the wire you are testing is actually broken.
When troubleshooting a dead headlight, disconnect the main wiring harness plug from the back of the headlight assembly and disconnect the car battery before touching the pins with your meter probes.
Never test continuity on a circuit that still has a fuse installed and the battery connected, as live power will skew your readings and potentially melt the meter’s internal circuitry.
- Disconnect the negative battery terminal and secure it away from the battery post.
- Unplug the wiring harness connectors at both ends of the wire you want to test.
- Remove any fuses associated with the circuit to prevent back-feeding other components.
- Clean any dirt, grease, or corrosion off the metal terminals before touching them with probes.
| Testing Condition | Safety Status | Expected Result Accuracy |
|---|---|---|
| Battery connected, circuit switched on. | Dangerous / High Risk. | Inaccurate (risk of meter damage). |
| Battery connected, circuit switched off. | Moderate Risk. | Unreliable (potential back-feeding). |
| Battery disconnected, harness unplugged. | Safe / Recommended. | Highly Accurate. |
How to Test Hard-to-Reach Wires and Connector Ports
One of the biggest challenges in automotive troubleshooting is testing wires that run from one end of the car to the other. Because your multimeter leads are only a few feet long, you cannot easily reach both ends of a wire at the same time.
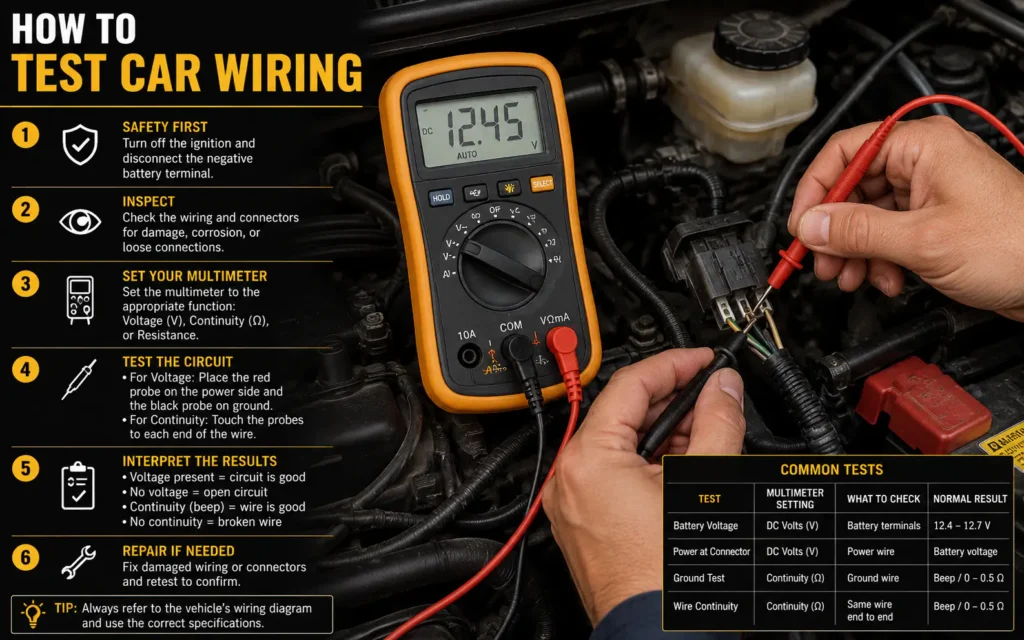
Another challenge is accessing the tiny metal pins inside plastic connector plugs. To test these safely, use a technique called back-probing.
If you need to test a wire running from the trunk release switch to the trunk latch, clip a long jumper wire to the trunk latch terminal, run it inside the cabin, and touch your multimeter probe to the other end of.
Do not jam thick multimeter probes directly into the front of female connector plugs.
- Use a flexible jumper wire with alligator clips to extend your reach across the vehicle.
- Insert a thin T-pin or paperclip into the wire side of the connector plug for safe back-probing.
- Avoid piercing the wire insulation directly with sharp probes, as this allows moisture to enter and corrode the.
- If you must pierce a wire to test it, seal the puncture point afterward with liquid electrical tape.
Interpreting Your Continuity Test Results
Once you touch your probes to the wire ends, your multimeter will give you one of three results. Understanding these results is key to solving your electrical mystery.
If your meter displays ‘OL’ or ‘1’ and remains silent, you have found an open circuit. This means the path is completely blocked.
A reading of 0.4 ohms with a loud beep confirms a healthy copper wire.
Do not assume a beep always means a perfect wire.
FAQs
How do you know if a car wire is broken internally?
If a wire looks perfectly fine on the outside but is broken internally, a continuity test will show ‘OL’ (Open Loop) on your multimeter and the meter will not beep. You can also gently wiggle the wire harness while holding the probes.
Can you test continuity with the car battery connected?
No, you should never test continuity with the battery connected. Live voltage in the circuit will interfere with the multimeter’s resistance measurement, leading to inaccurate readings, and it can easily blow the internal fuse of your multimeter.
What does OL mean on a multimeter when testing car wiring?
OL stands for ‘Open Loop’ or ‘Open Line.’ It means there is infinite resistance between the two probes, indicating that the electrical path is completely broken, disconnected, or open.
How do you find a short to ground using continuity?
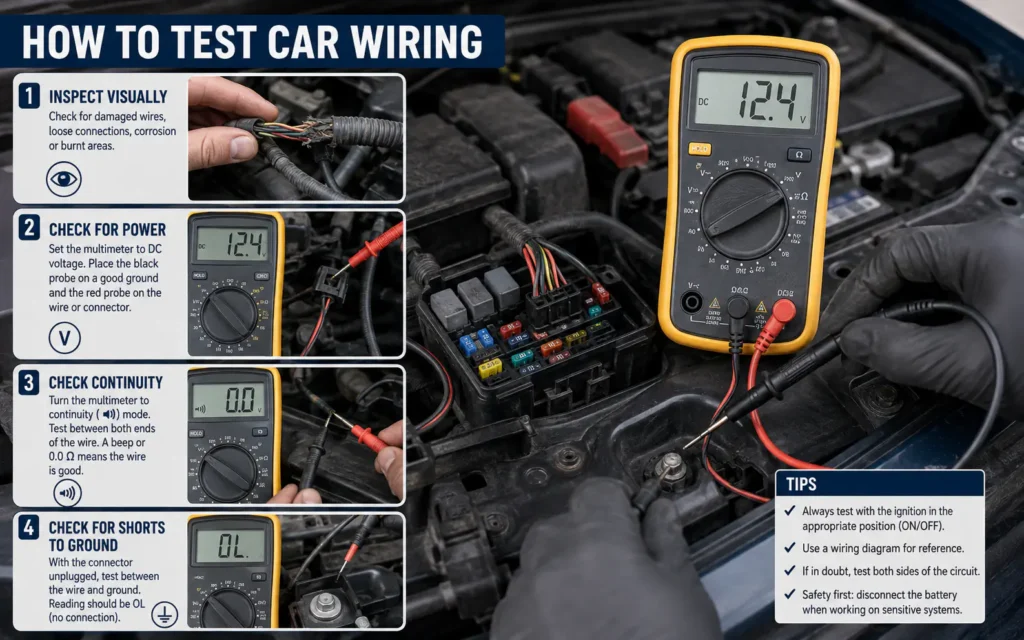
To find a short to ground, disconnect the battery and unplug the component at the end of the wire. Touch one multimeter probe to the wire you are testing and the other probe to a clean, unpainted metal part of the car.
Conclusion
Testing car wiring for continuity is a straightforward skill that saves you from guessing which parts to replace. By systematically isolating circuits, setting your multimeter correctly, and using safe probing techniques, you can pinpoint the exact location of broken wires or corroded connections without damaging your vehicle’s electronics.
Remember to always work with the battery disconnected and to protect delicate connector pins by back-probing rather than forcing probes into the terminals. Once you find the break, a proper crimp or solder repair sealed with heat-shrink tubing will restore your circuit and get your vehicle back on the road safely.
Related posts
 Why Do Dogs Stare at Walls? Common Causes and When to Worry
Wondering why do dogs stare at walls? Discover the sensory, behavioral, and medical reasons behind this behavior, and learn when to contact your veterinarian. When you…
 Why Organizing Space Reduces Stress: The Mental Clarity Connection
Discover why organizing space reduces stress. Learn how a tidy environment lowers cortisol, improves focus, and creates a sense of calm in your daily life. Organizing…
 Why Fresh Air Is Important in Your Home: Health and Comfort Benefits
Discover why fresh air is important in your home. Learn how proper ventilation dilutes indoor pollutants, controls humidity, and improves your daily health. Bringing fresh outdoor…