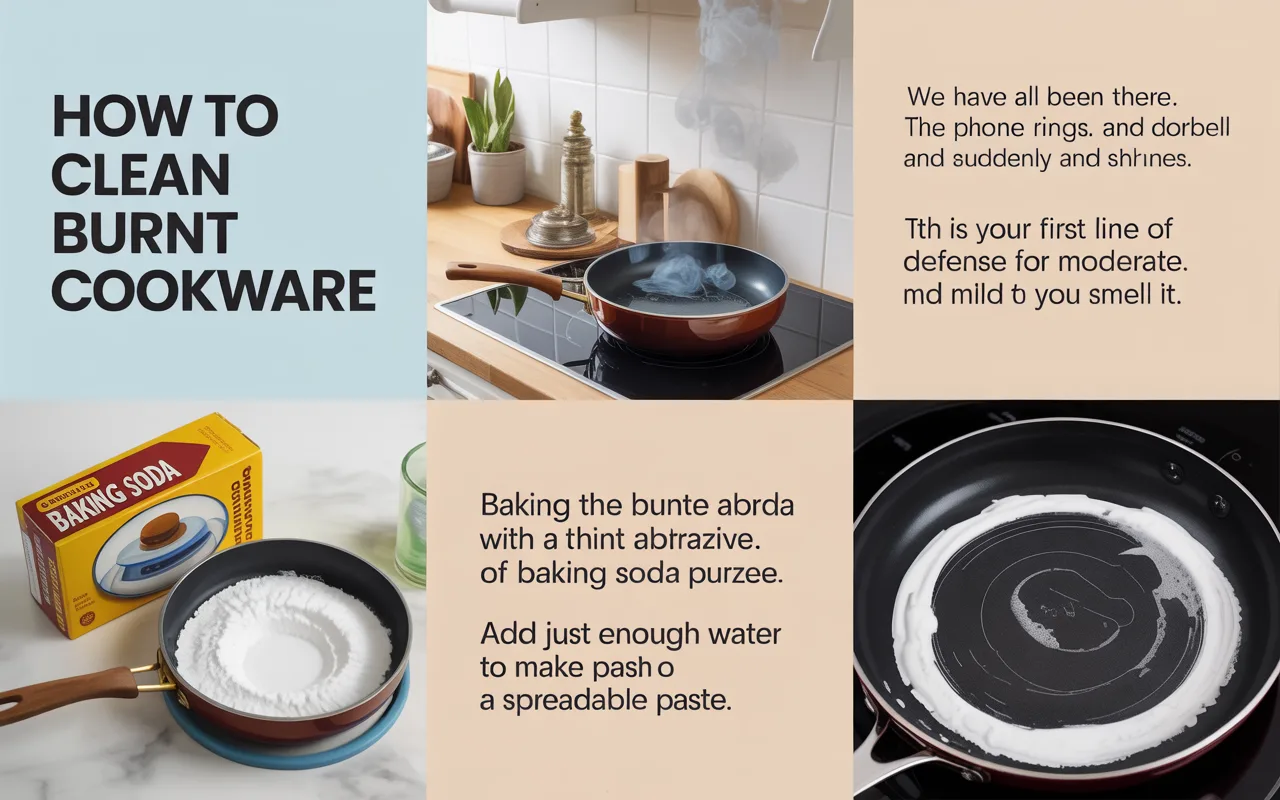
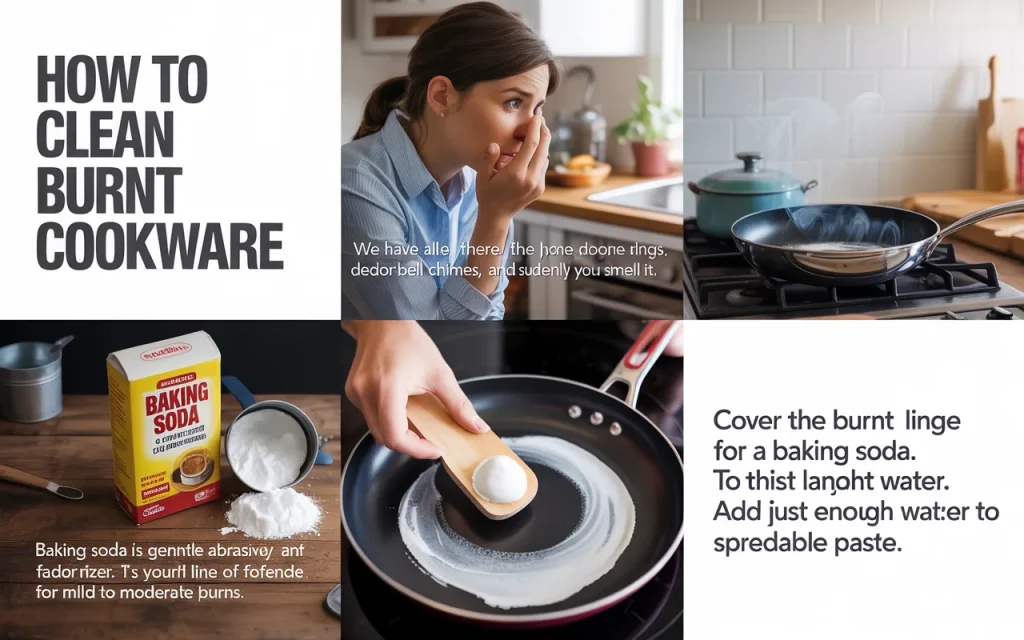
How to Clean Burnt Cookware
Ever faced a burnt pan and felt like just tossing it out? Don’t give up. You can clean burnt cookware with items you likely already have at home. This guide gives you clear, tested steps to rescue your pots and pans, saving you money and hassle. Learn the best ways to tackle tough, stuck-on food.
Why Burnt Messes Happen
We have all been there. The phone rings, the doorbell chimes, and suddenly you smell it. That acrid scent of food cooking a bit too long. It happens to everyone. Heat that is too high, a moment of distraction, or simply forgetting a simmering sauce can lead to a layer of stubborn, carbonized gunk. This burnt layer bonds strongly to the metal, making a simple scrub with soap nearly useless. But that does not mean your favorite pan is ruined. Understanding that this is a common kitchen problem is the first step. The good news is that chemistry and a little patience are on your side.
Julia Child once said, “The only real stumbling block is fear of failure. In cooking you’ve got to have a what-the-hell attitude.” This applies to cleaning up, too. Don’t fear the burnt pan. Attack it with confidence.
Your Safety First: Gear Up!
Before we start, let’s talk safety. Dealing with burnt-on grime often means using heat, strong smells, or abrasives.
- Protect Your Hands: Always wear rubber gloves. They shield your skin from hot water, strong soaps, and any sharp edges.
- Breathe Easy: Work in a well-ventilated area. If you are boiling a cleaning solution, turn on your stove’s hood fan or open a window.
- Use the Right Tools: Opt for wooden, silicone, or plastic scrapers and scrubbers before moving to more abrasive options. They protect your cookware’s surface.
- Know Your Pan: Check if your cookware has a special non-stick coating. Avoid very abrasive scouring pads on these surfaces to prevent scratching.
The Pantry Powerhouse: Baking Soda Method
Baking soda is a gentle abrasive and a fantastic deodorizer. It is your first line of defense for mild to moderate burns.
How to do it:
- Cover the burnt area with a thick layer of baking soda. Add just enough water to make a spreadable paste.
- Let it sit on the pan for at least an hour, or even overnight for tough spots.
- After soaking, use the paste as a gentle scrub with a non-stick safe sponge or cloth. The baking soda will help lift the burnt bits.
- For extra power, you can gently heat the pan with the paste in it for a few minutes on the stove. Let it cool before scrubbing.
- Rinse thoroughly.
This method is safe for almost all cookware types and is brilliantly simple.
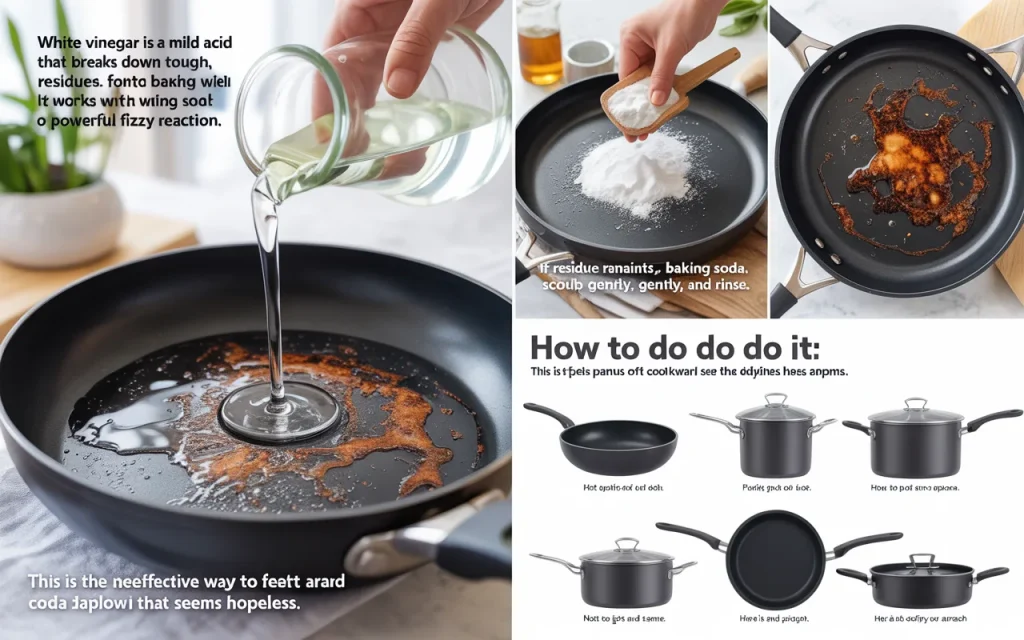
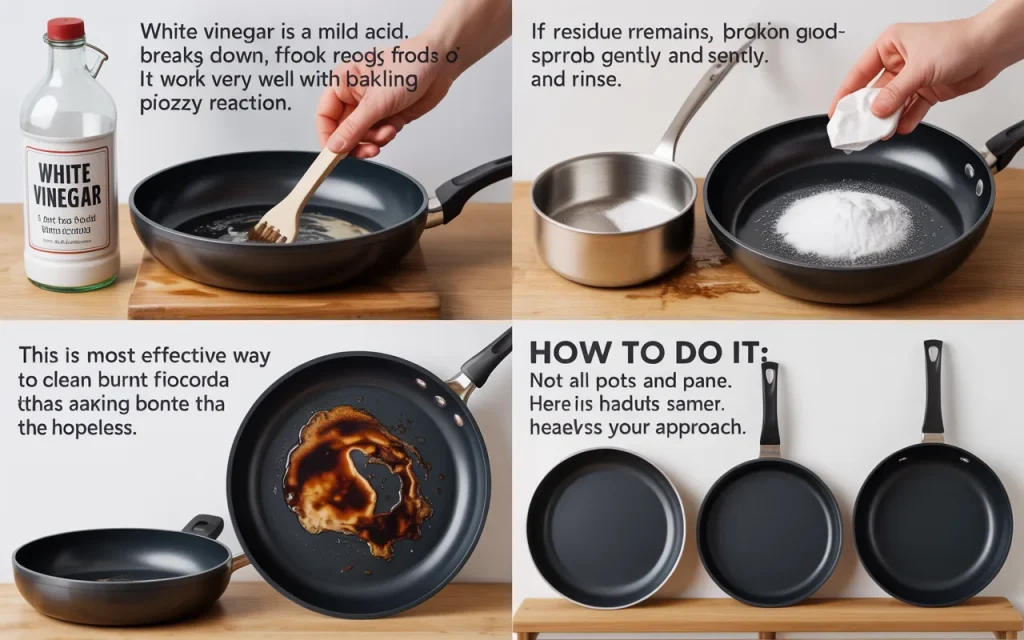
The Classic Champion: Vinegar Solution
White vinegar is a mild acid that breaks down tough, burnt food residues. It works very well with baking soda for a powerful fizzy reaction.
How to do it:
- Fill the burnt pot or pan with equal parts white vinegar and water.
- Bring the solution to a gentle boil on the stove, then reduce the heat and let it simmer for 10-15 minutes.
- Turn off the heat and let it cool completely in the pan. As it cools, the burnt bits will loosen.
- Once cool, pour out the liquid. Use a plastic scraper or sponge to remove the loosened grime.
- If residue remains, sprinkle baking soda on the area, scrub gently, and rinse.
| Method | Best For | Soak Time |
|---|---|---|
| Baking Soda Paste | Light to medium burns, all pan types | 1 hour to overnight |
| Vinegar Boil | Medium burns, pots with deep stuck-on food | 30 minutes to 1 hour (plus cooling) |
Tackling Extreme Burns: The Boil & Soak
For pots that look truly disastrous, a prolonged boil and soak is the answer. This is the most effective way to clean burnt cookware that seems hopeless.
How to do it:
- Put the burnt pot back on the stove. Fill it with enough water to cover the burnt area.
- Add a generous squirt of dish soap and about half a cup of white vinegar.
- Bring the water to a rolling boil. Let it boil for 5-10 minutes.
- Turn off the heat. Now, add two tablespoons of baking soda. Be careful, as it will fizz up.
- Let the pot sit until the water is fully cool. This can take a few hours. The long, hot soak breaks the bond between the food and the metal.
- Once cool, you will find most of the burnt crust has floated free or wipes away easily. Dump the water and give it a final scrub and rinse.
As chef and author James Beard noted, “The kitchen is a place where we deal with elemental things.” Cleaning is part of that elemental process, transforming a mess back into a tool.
Special Cases: Different Cookware Materials
Not all pots and pans are the same. Here is how to adjust your approach.
Non-Stick Pans: Avoid harsh abrasives and metal scrapers. Use the baking soda paste method with a soft sponge. Never use the high-heat boil method on non-stick, as it can damage the coating.
Stainless Steel: Stainless is durable. You can use all the methods above. For final shine, use a dedicated stainless steel cleaner or a paste of baking soda and a tiny bit of water.
Cast Iron: This is unique. You must preserve the pan’s seasoned layer. Never use soap for regular cleaning of seasoning. For burnt food, use coarse salt and a stiff brush or chainmail scrubber with hot water. Dry it completely on the stove and rub with a thin layer of oil after.
Enameled Cast Iron: The enamel coating can chip. Use gentle methods like baking soda paste. Avoid extreme temperature shocks and metal utensils.
Everyday Tools That Help Clean Burnt Cookware
You might not need fancy products. Look in your kitchen first.
- Dish Soap & Hot Water: A long soak in very hot, soapy water can work for fresh burns.
- Salt Scrub: For mild sticking, a paste of coarse salt and a little water makes a great abrasive scrub.
- Lemons: Cut a lemon in half, sprinkle salt on the cut side, and use it to scrub. The acid and abrasive work together.
- Denture Tablets: Drop a few into a burnt pot, fill with hot water, and let sit. The effervescence helps lift grime.
| Tool | Use For | Be Cautious With |
|---|---|---|
| Plastic Scraper | Loosening large chunks | Non-stick coatings (use gently) |
| Copper Scrubber | Tough stains on stainless steel | Non-stick, cast iron seasoning |
| Soft Sponge | Daily cleaning & gentle pastes | All cookware is safe |
| Chainmail Scrubber | Stuck-on food on cast iron | Everything except non-stick |
Frequently Asked Questions
Can I use oven cleaner on a burnt pan?
It is not recommended for most cookware, especially pots you cook food in directly. The harsh chemicals can leave residues that are hard to fully rinse away and may damage certain surfaces.
What should I never use to clean a burnt pan?
Avoid using sharp metal tools like knives or heavy-duty steel wool on most pans, as they will cause deep scratches. Do not use bleach, as it can react with metals and is unsafe for food surfaces.
My pan still has stains after cleaning. Is it safe to use?
Yes. Often, a dark stain or “shadow” may remain on stainless steel or other metals even after the burnt layer is gone. This is usually just a discoloration of the metal and is not harmful. Your pan is clean and safe to cook with.
How can I prevent burnt pans in the future?
Use the right heat level (medium is often enough), do not walk away from simmering sauces, and consider using a heat diffuser on gas stoves. Soaking a pan right after use in hot, soapy water also prevents food from hardening.
A Final Shine and Prevention Tips
Once you have cleaned your cookware, dry it completely with a towel to prevent water spots. For stainless steel, a quick polish with a little cooking oil on a cloth can restore a brilliant shine. The best strategy, of course, is to avoid the burn in the first place. Use timers, stay nearby when cooking with high sugar or dairy content, and soak pans immediately after dinner. But when accidents happen, remember you have the skills to fix them.
As home economist and writer Marion Cunningham advised, “No one is born a great cook, one learns by doing.” The same is true for cleaning. Each burnt pan is a lesson learned.
Conclusion
A burnt pot is not the end of the world, or the end of your cookware. With simple items like baking soda, vinegar, and a little time, you can clean burnt cookware effectively and save your favorite kitchen tools. The key is to act fast, choose the right method for your pan type, and always put safety first. Remember, a clean pan is a happy pan, ready for your next cooking adventure. Do not let a little burnt food scare you. You have got this.
Related posts
 Hand Blender vs Food Processor: Choosing Your Kitchen Workhorse
Deciding between a hand blender vs food processor? Compare the Mueller Multistick immersion blender with the Hamilton Beach mini food processor to find the best tool…
 Blender vs Juicer: Choosing Between the Hamilton Beach and Nutribullet
Decide between a Blender vs Juicer for clear, pulp-free drinks and a blender for fiber-rich smoothies and soups. Compare the Hamilton Beach Juicer Machine and Nutribullet…
 Best Mattress for Back Pain: Top Mattresses and Toppers for Relief
Find the best mattress for back pain with our detailed guide. Compare top memory foam mattresses and cooling toppers for pressure relief and support. Waking up…