
How to Test a Car Ground Connection: Step-by-Step Multimeter Methods
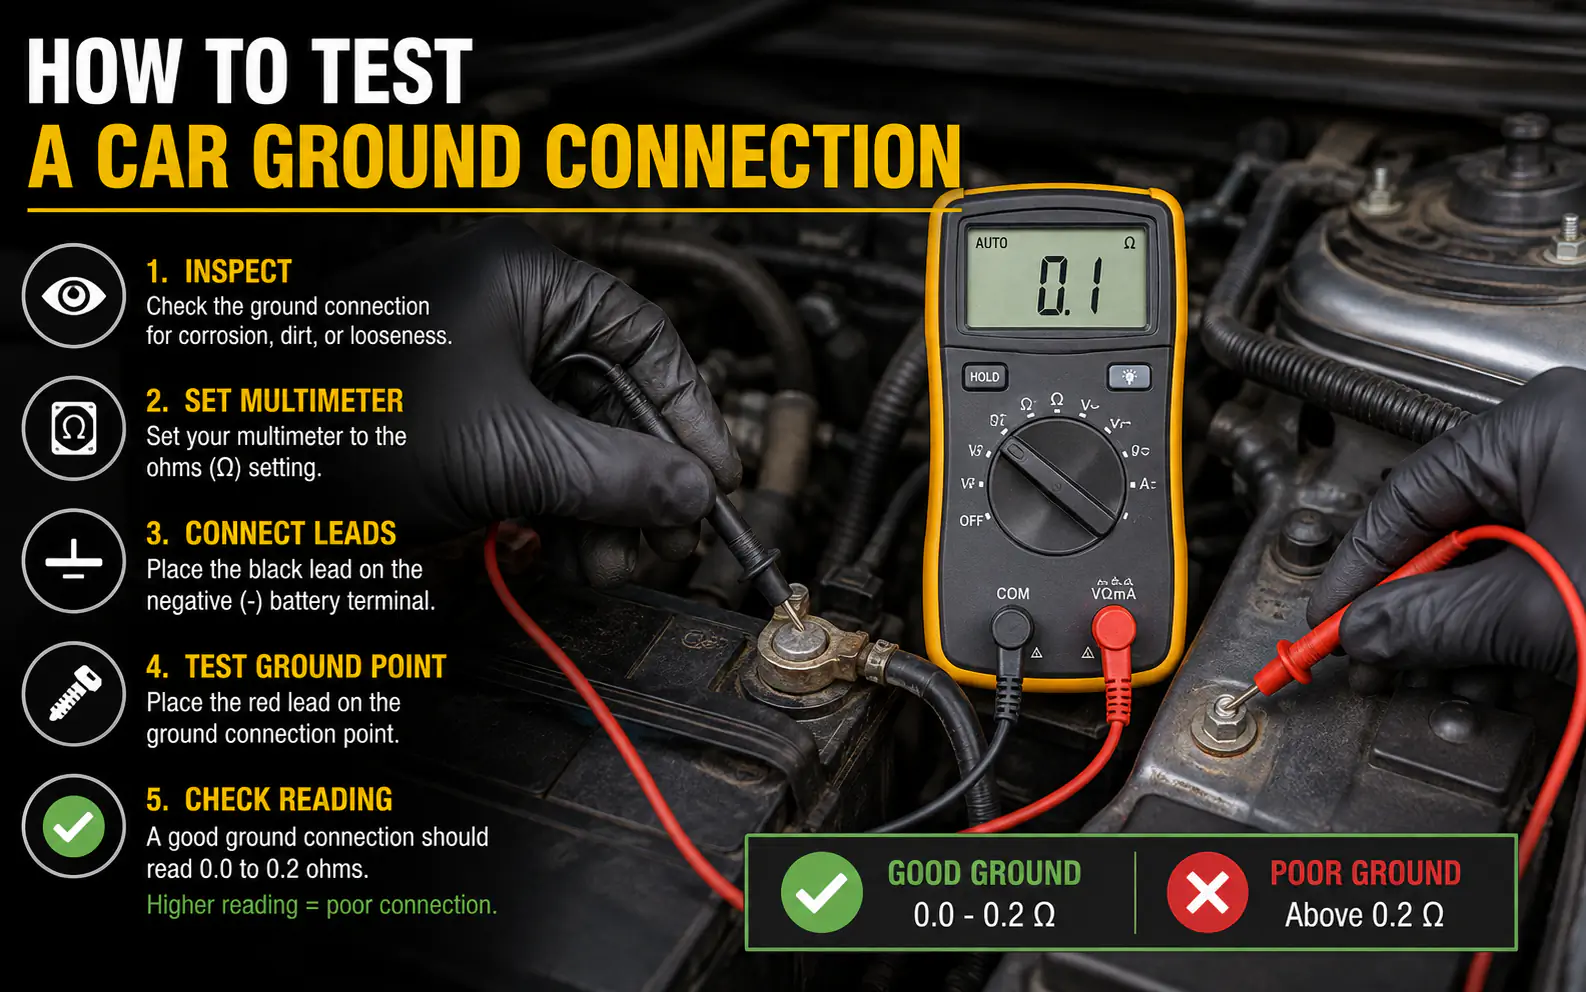
A car ground connection is the backbone of your vehicle’s electrical system. Because cars use a single-wire system, the metal chassis and engine block serve as the return path to the negative battery terminal. If a ground connection is loose, rusted, or corroded, electrical components will behave erratically or stop working entirely.
To test a car ground connection, you should use a digital multimeter to perform a voltage drop test while the circuit is active. This method is far more reliable than a simple continuity test because it measures how the ground performs under a real electrical load. A healthy ground connection should show a voltage drop of less than 0.2 volts. If the reading is higher, the connection is weak and needs to be cleaned or tightened.
Safety checks
- A visual check for rust, paint, and loose bolts is always the first step.
- Voltage drop testing is the most reliable way to test a ground under real operating conditions.
- A good ground connection should read less than 0.2 volts during a voltage drop test.
- High resistance readings on a multimeter indicate corrosion or loose connections that need cleaning.
| Topic | When it helps | What to keep in mind |
|---|---|---|
| Step 1 | Identifying obvious physical failures quickly. | A ground connection can look perfectly clean on the outside but still have hidden corrosion underneath the terminal ring. |
| Step 2 | Quickly checking unpowered circuits or isolated wires. | This test uses the multimeter’s tiny internal battery, which cannot detect a wire that is held together by only a single strand of copper. |
| Step 3 | Diagnosing active electrical issues under real operating conditions. | Ensure the circuit is switched on and drawing power, or the test will show zero volts regardless of ground quality. |
| Step 4 | Quickly diagnosing starting or cranking issues without a multimeter. | Never connect the jumper cable to any positive terminals or live wires, as this will cause a dangerous short circuit. |
Focus strictly on testing methods
Step 1. Perform a Visual and Physical Inspection
Before pulling out diagnostic tools, locate the ground wire you want to test. Follow the wire from the component or battery to where it bolts to the metal chassis. Look closely for rust, green corrosion, dirt, or paint on the metal surface. Wiggle the wire to ensure the connection bolt is completely tight.
- Identifying obvious physical failures quickly.
- A ground connection can look perfectly clean on the outside but still have hidden corrosion underneath the terminal ring.
- If the connection is visibly loose or heavily rusted, clean and tighten it before proceeding to electrical tests.
- Difficulty – Very Easy
- Tools Needed – None
- Time Required – 5 minutes
Step 2. Test Resistance with a Multimeter
Set your digital multimeter to the lowest Ohms setting. Touch one probe to the negative battery terminal and the other probe to the ground point or metal chassis near the component. A perfect ground connection should read very close to zero ohms, typically below 0.5 ohms.
- Quickly checking unpowered circuits or isolated wires.
- This test uses the multimeter’s tiny internal battery, which cannot detect a wire that is held together by only a single strand of copper.
- If the resistance is high or reads ‘OL’ (Open Loop), you have a broken wire or severe corrosion.
- Difficulty – Easy
- Tools Needed – Digital Multimeter
- Target Reading – Below 0.5 Ohms
Step 3. Perform a Voltage Drop Test Under Load
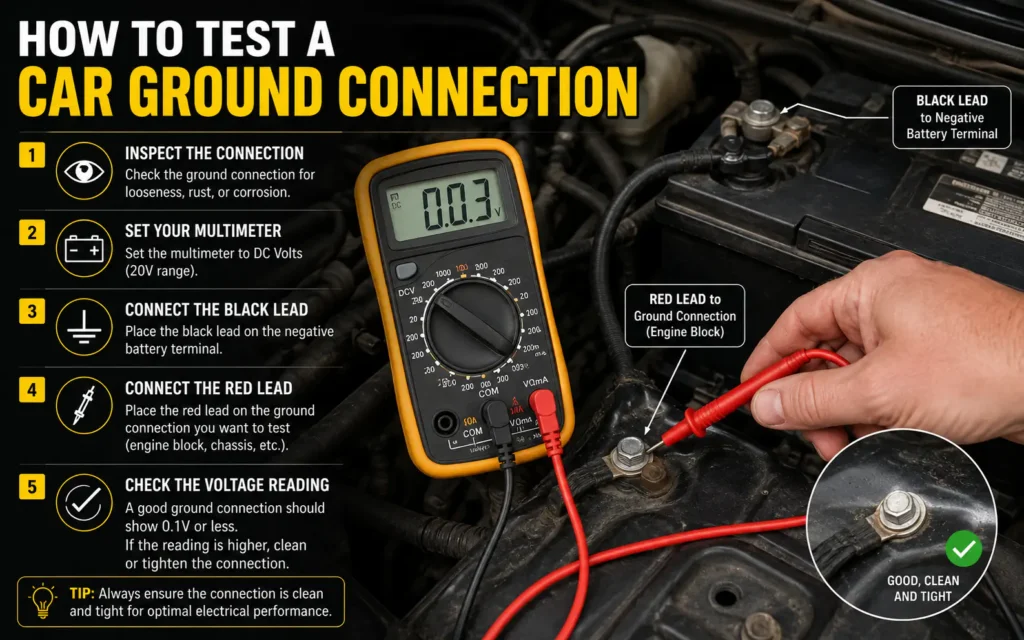
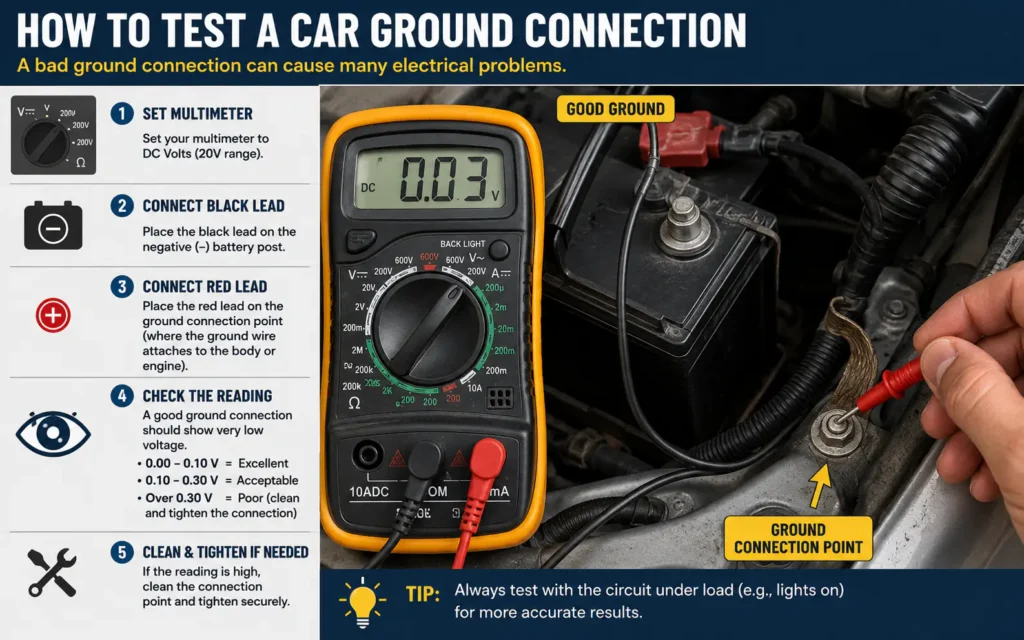
This is the most accurate test. Set your multimeter to DC Volts. Turn on the electrical accessory you are testing (such as headlights or the blower motor) so current is flowing. Touch the red probe to the metal casing of the component or its ground wire terminal, and the black probe to the negative battery post.
- Diagnosing active electrical issues under real operating conditions.
- Ensure the circuit is switched on and drawing power, or the test will show zero volts regardless of ground quality.
- A reading below 0.2 volts indicates a good ground. Anything higher means there is unwanted resistance in the ground path.
- Difficulty – Medium
- Tools Needed – Digital Multimeter
- Target Reading – Below 0.2 Volts
Step 4. Use a Jumper Cable Bypass Test
If you suspect a bad engine ground is causing starting issues, you can perform a quick bypass test. Connect one end of a heavy-duty jumper cable to the negative battery terminal. Connect the other end directly to a clean, unpainted metal part of the engine block. Try starting the vehicle.
- Quickly diagnosing starting or cranking issues without a multimeter.
- Never connect the jumper cable to any positive terminals or live wires, as this will cause a dangerous short circuit.
- If the engine cranks normally with the cable attached but struggles without it, the main engine ground is faulty.
- Difficulty – Easy
- Tools Needed – Jumper Cables
- Time Required – 5 minutes
Essential Tools and Safety Steps
Testing automotive electrical systems requires basic preparation to ensure safety and accuracy. Working around a car battery carries a risk of short circuits, which can damage expensive onboard computers or cause sparks. Always work in a well-ventilated, dry area.
Before starting your tests, gather a digital multimeter, safety glasses, and basic hand tools like wrenches or wire brushes. Ensure your vehicle’s ignition is off unless you are performing a test that specifically requires the engine to run or accessories to be turned on.
Before touching any wires near the alternator or starter motor, remove any metal jewelry or watches to prevent accidental bridging of live terminals.
Do not use a test light on sensitive computer sensor grounds, as the current draw of the bulb can damage delicate electronic control units.
- Wear safety glasses to protect against battery acid or stray sparks.
- Keep loose clothing and hair away from moving engine parts like belts and fans.
- Set your multimeter to the correct scale (DC Volts or Ohms) before touching the probes to any terminals.
- Ensure your multimeter leads are plugged into the correct ports (COM for black, V/Ohm for red).
Why the Voltage Drop Test is the Best Method
Many DIYers rely solely on continuity or resistance tests to check grounds. While these tests are useful for finding completely broken wires, they can easily mislead you. A ground wire with ten broken copper strands and only one remaining intact strand will still show continuity on a multimeter.
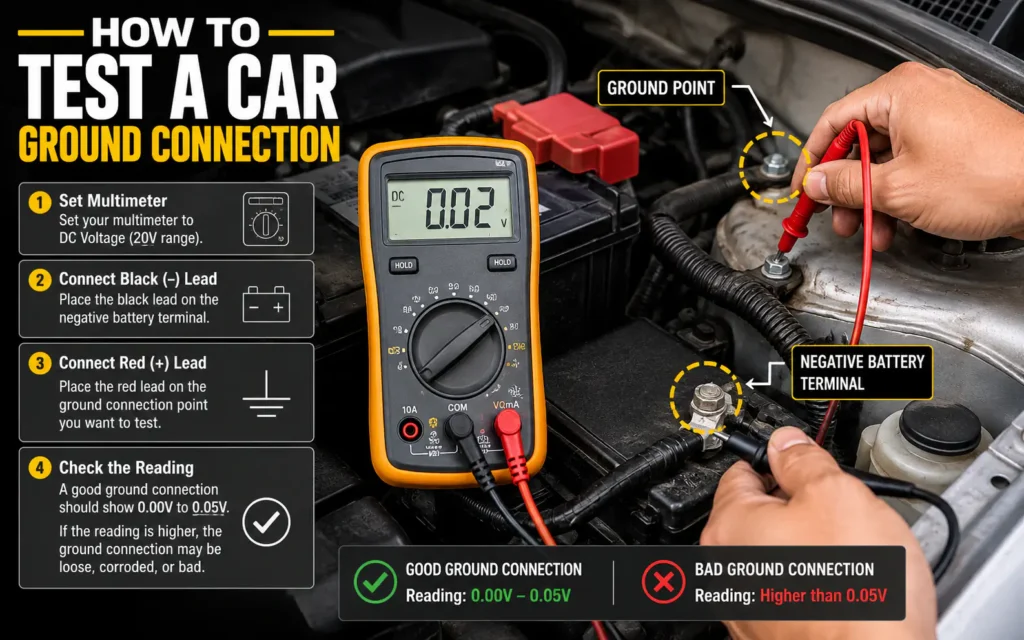
However, as soon as you turn on a high-draw component like the headlights, that single strand cannot handle the electrical current. The circuit chokes, creating a voltage drop. Measuring voltage drop while the circuit is active is the only way to see how the ground performs under real-world stress.
Imagine a garden hose that is pinched almost completely shut. A tiny trickle of water still gets through, but you cannot run a sprinkler with it. A resistance test only checks if a trickle can get through; a voltage drop test checks if the hose can handle full water pressure.
Do not assume a ground is good just because a multimeter shows continuity. Continuity tests do not load the circuit.
| Test Type | Circuit State | What It Measures | Pros | Cons |
|---|---|---|---|---|
| Resistance (Ohms) | Off / Unpowered | Static electrical resistance | Quick, easy for beginners | Can miss partially broken wires |
| Voltage Drop | On / Under Load | Lost voltage across a connection | Highly accurate, realistic | Requires active power in circuit |
| Visual Inspection | Off / Unpowered | Physical condition of connection | No tools required | Cannot detect internal wire damage |
Common Signs of a Weak Ground Connection
Bad ground connections are notorious for causing bizarre, intermittent electrical problems. Because multiple components often share a single ground point, a failure at that point can cause electricity to backfeed through other circuits to find a path to ground.
This backfeeding leads to strange symptoms where operating one accessory causes another to malfunction. Recognizing these signs early can save you hours of frustrating troubleshooting and prevent you from buying unnecessary replacement parts.
If your dashboard lights dim every time you step on the brake pedal, or if your radio turns off when you use the turn signals, you are likely dealing with a shared bad ground.
Do not immediately replace expensive parts like the alternator or starter motor without testing the ground connections first.
- Dimming or flickering headlights and dashboard displays.
- A clicking starter motor or slow engine cranking, even with a fully charged battery.
- Erratic sensor readings or random check engine lights.
- A battery that drains rapidly or fails to charge properly.
- Electrical accessories that only work intermittently or shut off unexpectedly.
FAQs
How can I test if my car has a bad ground connection without a multimeter?
You can use a basic 12V test light. Connect the clamp of the test light to the positive battery terminal and touch the probe to the ground point. If the bulb lights up brightly, the ground path is complete. You can also use the jumper cable bypass method to see if bypassing the ground resolves your electrical symptoms.
What should a multimeter read when testing a car ground?
When performing a voltage drop test under load, the multimeter should read below 0.2 volts (ideally 0.0 to 0.1 volts). When performing a static resistance test with the circuit off, the reading should be below 0.5 ohms.
Can a bad ground connection drain a car battery?
Yes. A bad ground can prevent the alternator from properly charging the battery while the engine is running. It can also cause relays to stick open, leading to a parasitic draw that drains the battery overnight.
Where are the main ground connections located on a car?
The primary ground connections are the negative battery cable to the chassis, the engine block to the chassis (often a heavy braided strap), and individual wiring harness grounds located under the dashboard, near the headlights, and in the trunk area.
Conclusion
Testing a car ground connection is a straightforward process that can save you significant time and money when troubleshooting electrical issues. By starting with a thorough visual inspection and following up with a dynamic voltage drop test, you can easily isolate stubborn electrical faults.
If your tests reveal a bad ground, the fix is usually simple. Remove the ground bolt, clean the wire terminal and the metal mounting surface with a wire brush until you see shiny metal, and reinstall the bolt securely. This simple maintenance step ensures your vehicle’s electrical system operates reliably.
Related posts
 Why Pest Control Is Important at Home: Protecting Health and Property
Discover why pest control is important at home. Learn how regular pest management protects your family’s health, prevents property damage, and secures your food. Understanding why…
 Why Do Dogs Stare at Walls? Common Causes and When to Worry
Wondering why do dogs stare at walls? Discover the sensory, behavioral, and medical reasons behind this behavior, and learn when to contact your veterinarian. When you…
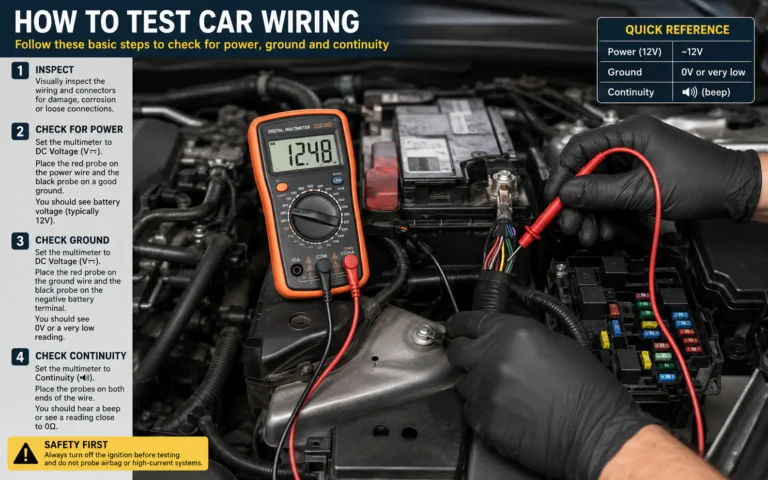 How to Test Car Wiring for Continuity Using a Multimeter
Learn how to test car wiring for continuity safely. Find broken automotive wires, check connector ports, and diagnose electrical issues with a multimeter. Testing car wiring…